
Установим SSL сертификаты на почтовый сервер hMailServer. Используем порты для SSL/TLS:
- SMTP 587
- IMAP 993
- POP3 995
Сами сертификаты будем брать бесплатные — Let’s Encrypt.
SSL certificates are a useful step to protect your web application server by securing data exchange. This guide explains how to install a Let’s Encrypt SSL certificate on Windows Server 2019 with the Internet Information Services (IIS) web server.
In this guide, we will show you how to install and bind a free TLS/SSL Let’s Encrypt certificate for a site on the IIS web server running on Windows Server 2019/2016/2012 R2.
Для успешного подключения к ферме, нам необходимо установить SSL сертификат. В данный момент я не буду рассматривать самоподписанный, так как коммерческий стоит не так и дорого, чтоб не иметь возможности его приобрести, да и как правило в организации уже зачастую есть wildcard сертификат для других нужд. Так же совершенно спокойно можно использовать Let’s Encrypt сертификат с автоматическим перевыпуском и установкой на все необходимые сервисы, которым мы и воспользуемся.

![]()
Ранее я настраивал сертификат Let’s Encrypt на IIS для нескольких своих доменов.
IIS — SSL сертификат Let’s Encrypt
Один из доменов мне больше не понадобится, удаляем Let’s Encrypt SSL сертификат из IIS. Тем более что при попытке обновления сертификата из-за отсутствия работающего в IIS сайта я постоянно получаю письмо вида:
Сама оснастка управления IIS нам не понадобится, будем пользоваться ранее установленной консольной утилитой LetsEncrypt-Win-Simple.
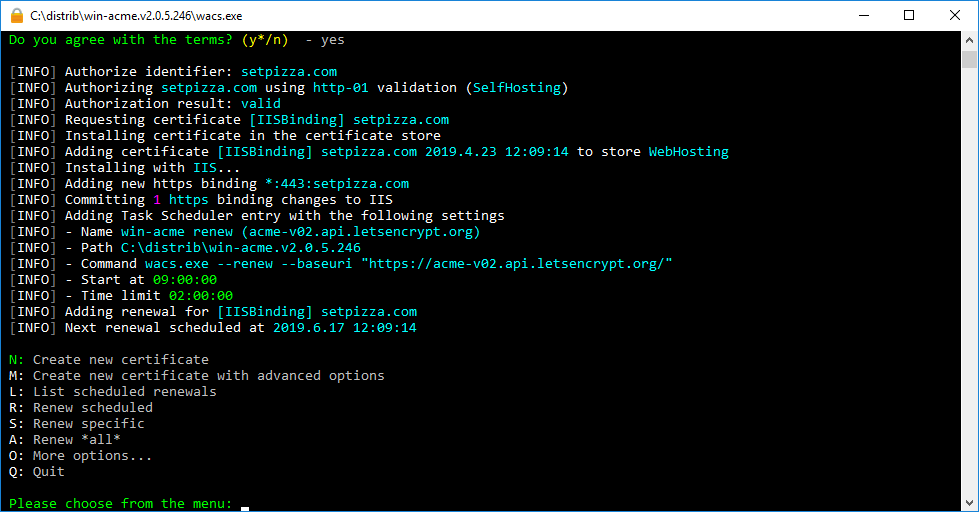
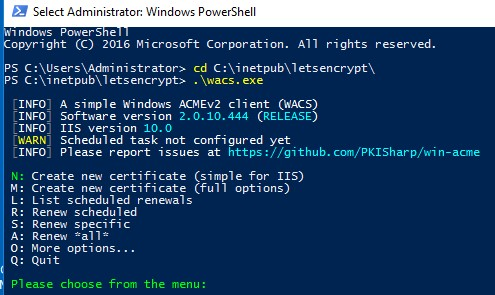
Запускаем wacs.exe под администратором.
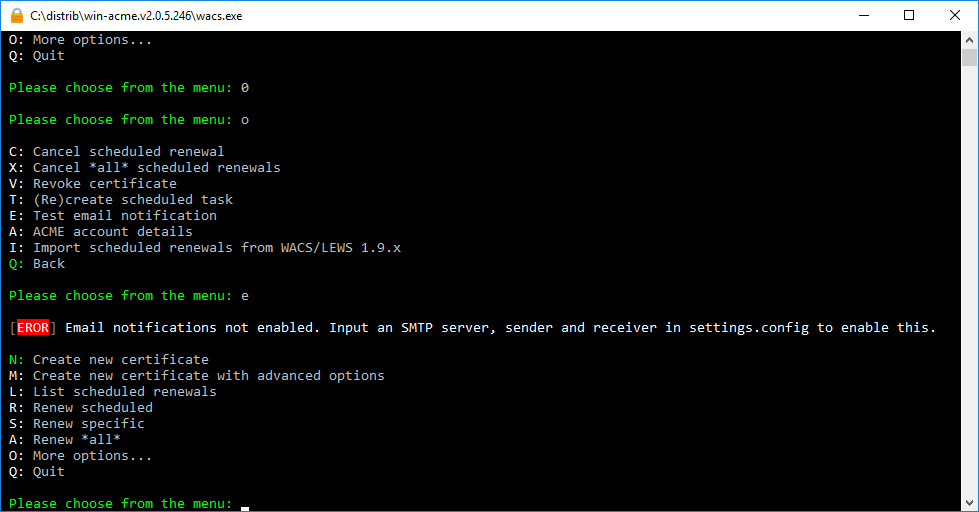
Выводим список сертификатов: L.
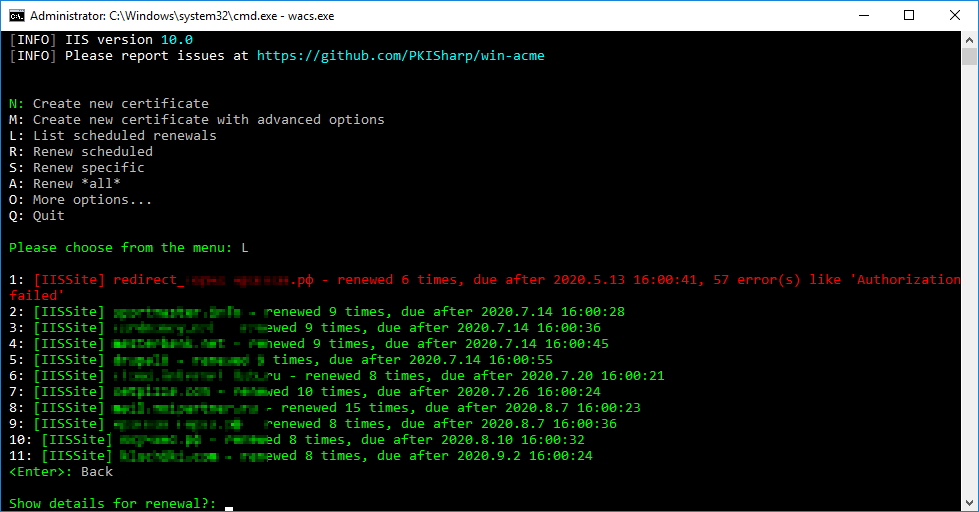
Под первым пунктом видим протухший сертификат, который уже 6 раз не удалось обновить. Подробные ошибки можно посмотреть, указав номер сертификата: 1.
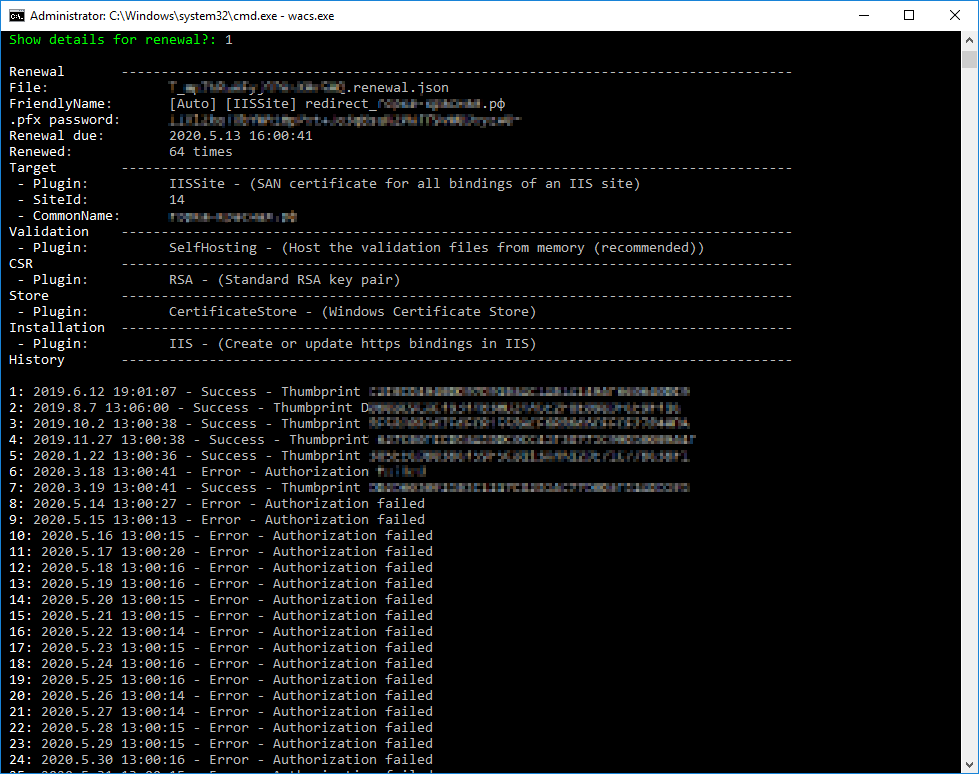
но это уже не важно. Возвращаемся в главное меню и выводим больше опций: O.
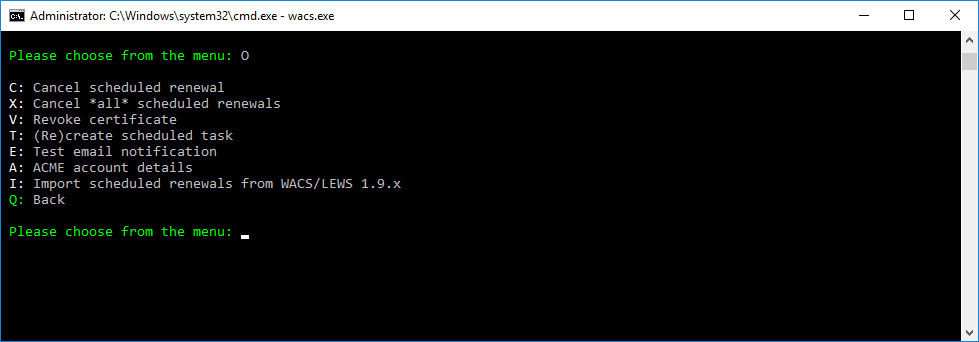
Выбираем пункт Cancel sheduled renewal: C.
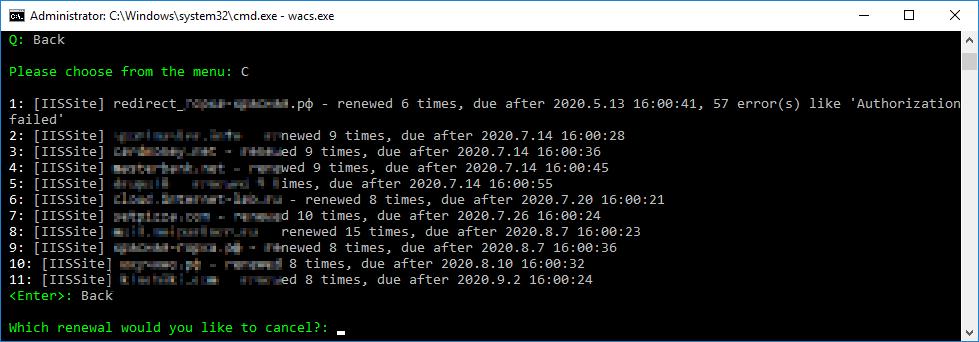
Указываем номер сертификата, который нужно удалить (перестать пытаться обновить): 1.
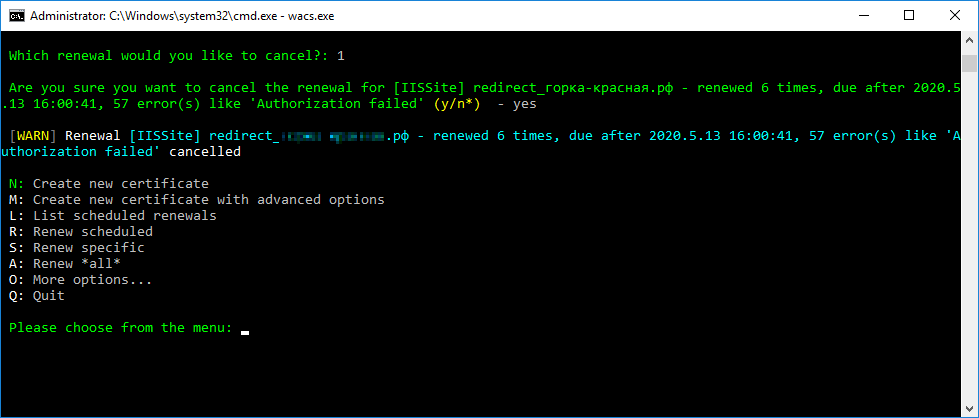
Обновление сертификата отменено.
![]()
Сегодня автоматизируем установку бесплатного SSL сертификата на сайт, который работает на web-сервере IIS 10. Операционная система Microsoft Windows 2016. Сертификат выдается лишь на 90 дней, но его всегда можно быстро обновить в автоматическом режиме.
Наличие SSL сертификата для сайта позволяет защитить данные пользователей, передаваемые по сети и гарантировать целостность переданных данных. Хотя, если вы попали на эту статью, то вы уже знаете для чего вам нужен сертификат.
Для установки сертификата будем использовать консольную утилиту LetsEncrypt-Win-Simple.
Подготовка
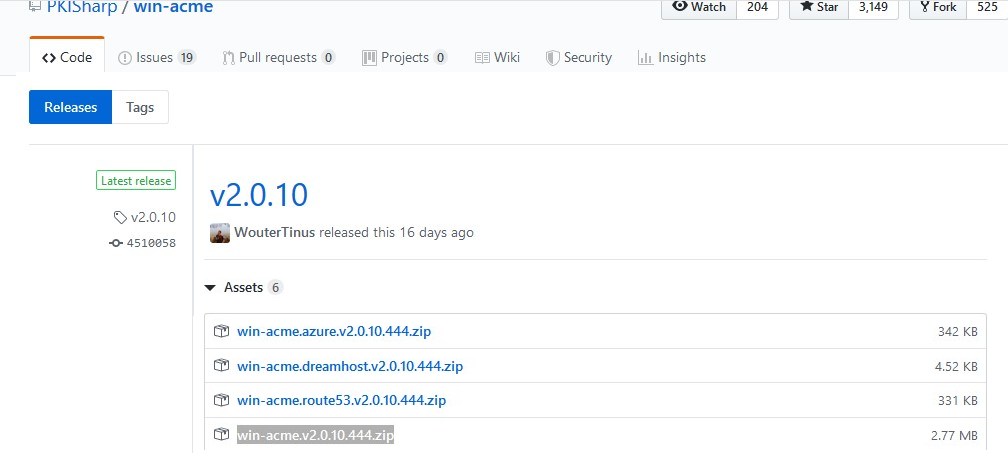
LetsEncrypt-Win-Simple берём здесь:
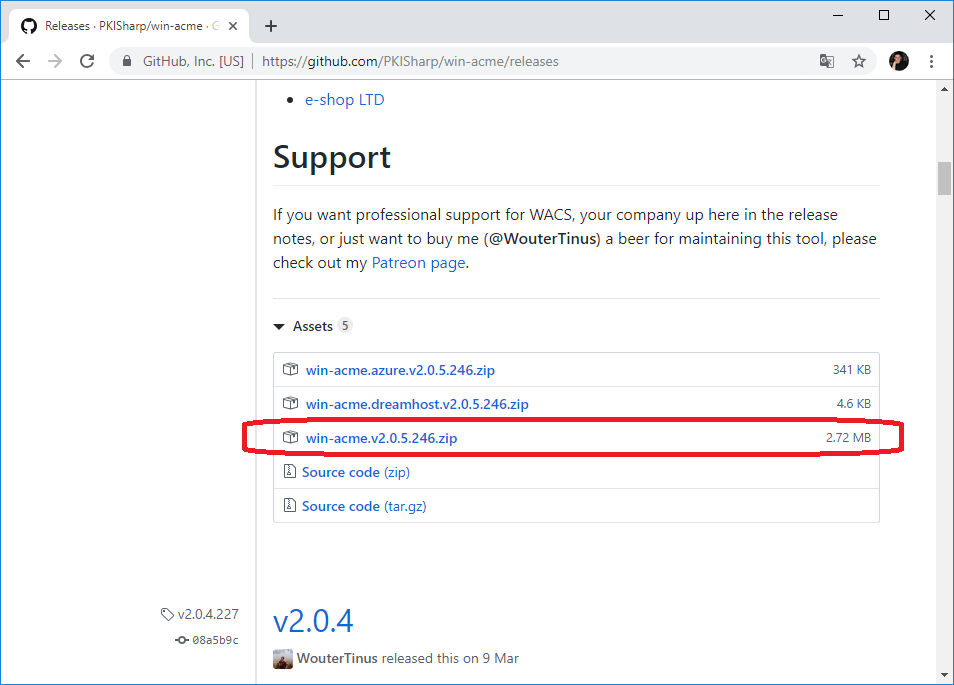
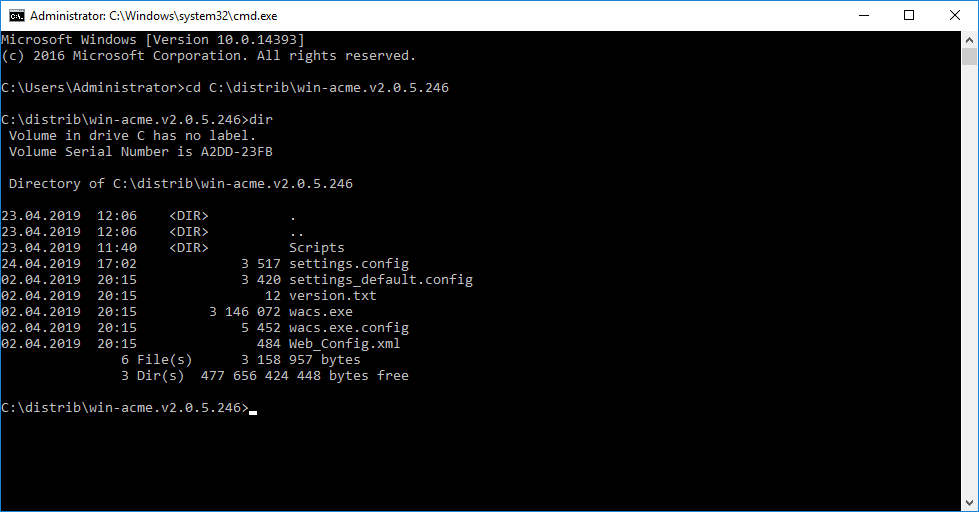
Я скачал версию v2.0.5.246. Распаковываем архив.
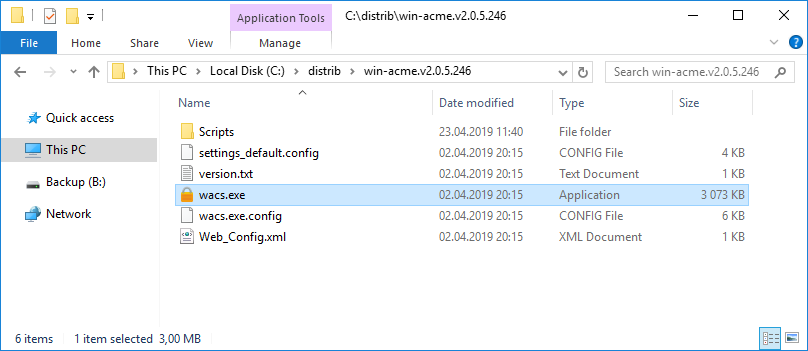
Папка win-acme.v2.0.5.246 нам потом пригодится для автоматического продления сертификатов, которое будет запускаться через Task Scheduler, не удаляйте.
При запуске wacs.exe хочет .NET Framework 4.7.2.
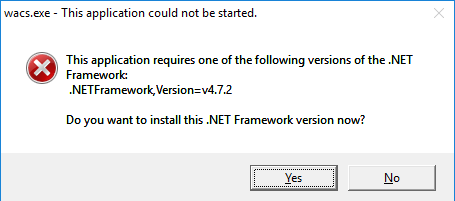
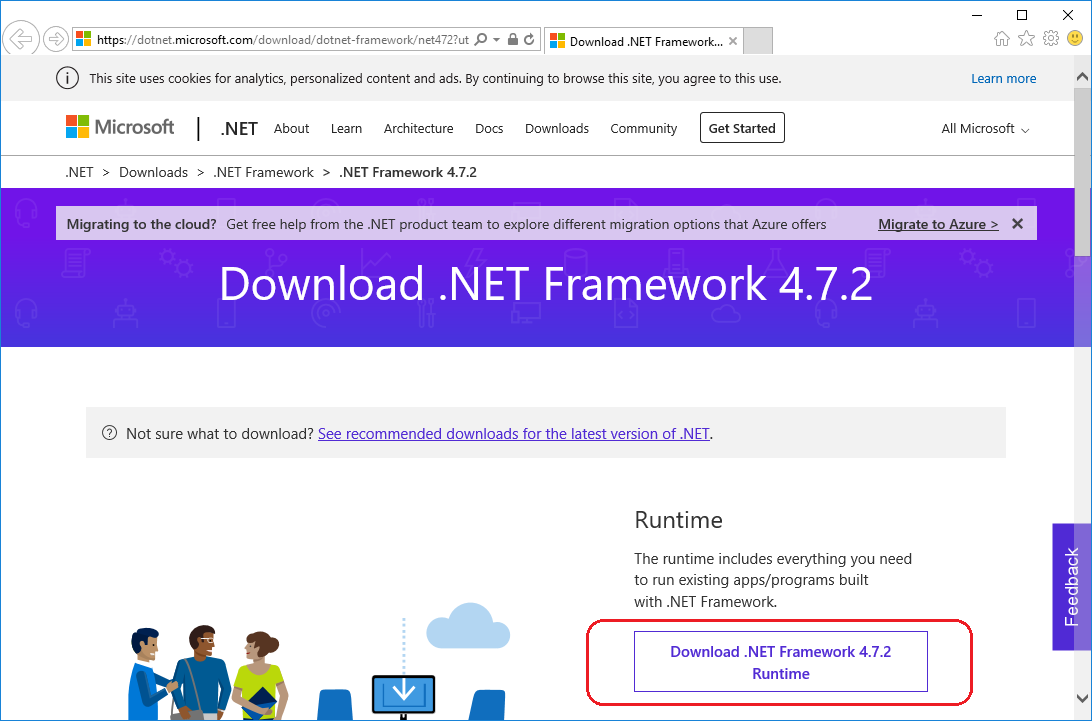
Качаем .NET Framework 4.7.2 и запускаем установку.
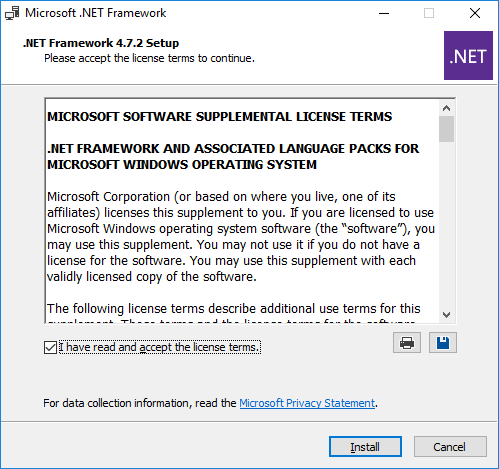
Принимаем лицензионное соглашение, Install.

.NET Framework 4.7.2 установлен.
Перезагружаем сервер. Подготовка к установке сертификатов завершена.
Устанавливаем SSL сертификат
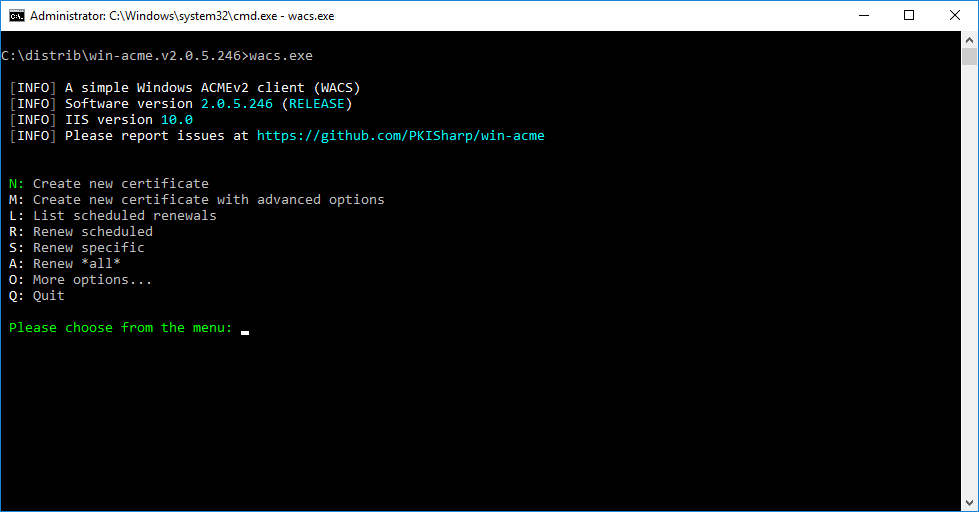
Запускаем wacs.exe под администратором.
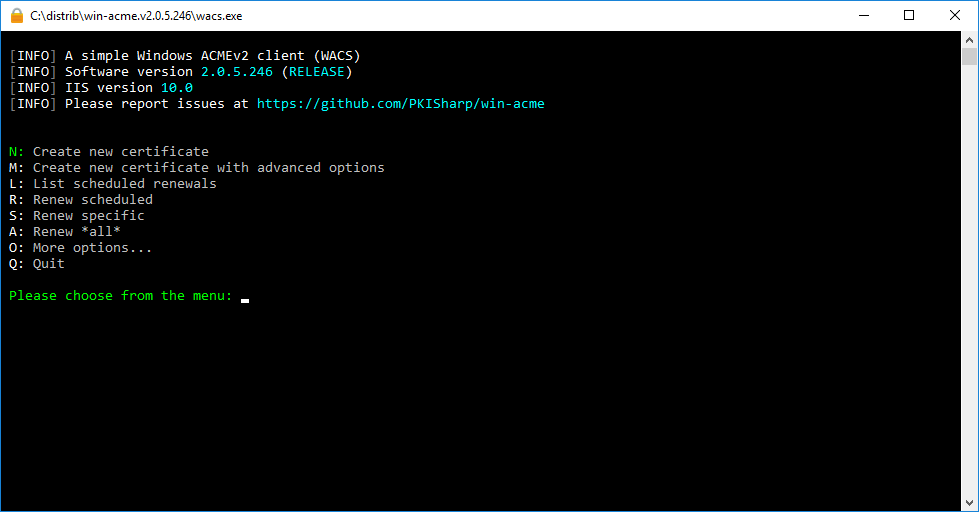
Для начала сгенерируем простой сертификат. Для этого выбираем Create new certificate, N. Нас спрашивают, какой сертификат делаем.

Для тестирования генерируем простой сертификат без псевдонимов (для установки сертификата с псевдонимами выберите 2). Пишем 1. Нам показывают список всех доменов, забинденных в IIS.
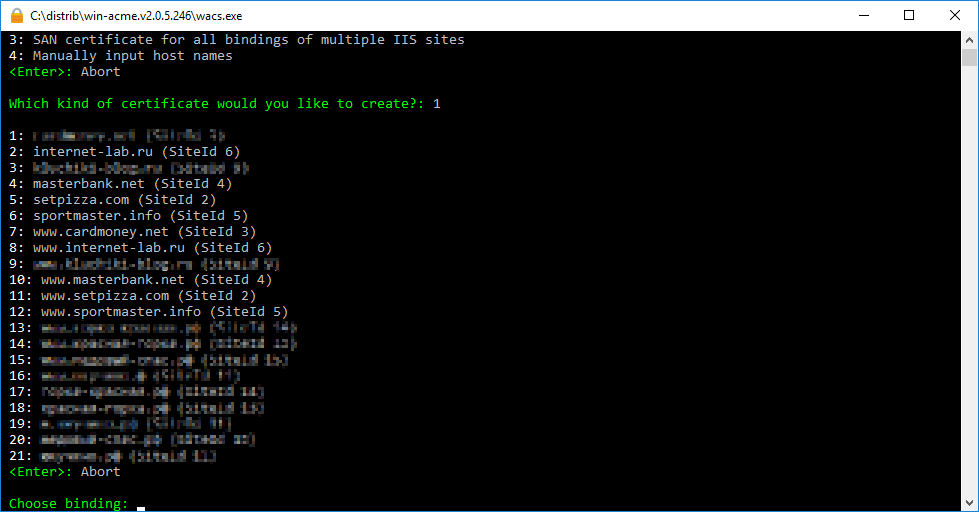
Жертвой будет setpizza.com. Пишем 5.


Нужно принять лицензионное соглашение. Если написать «y», то откроется PDF файл с соглашением. Принимаем лицензионное соглашением.
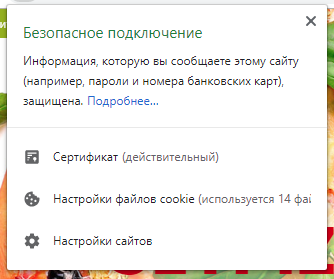
Проверяем сертификат
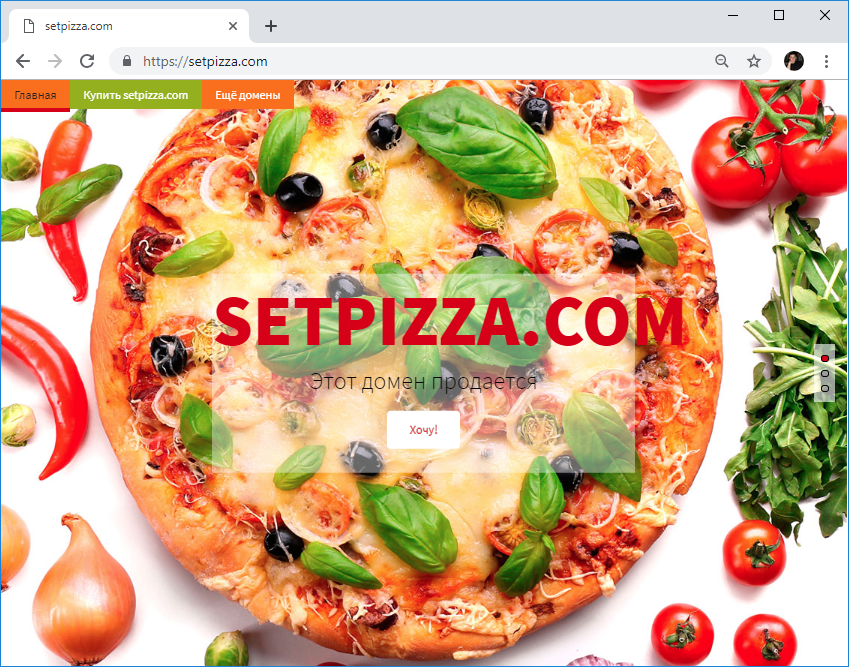
Всё работает, сертификат есть.
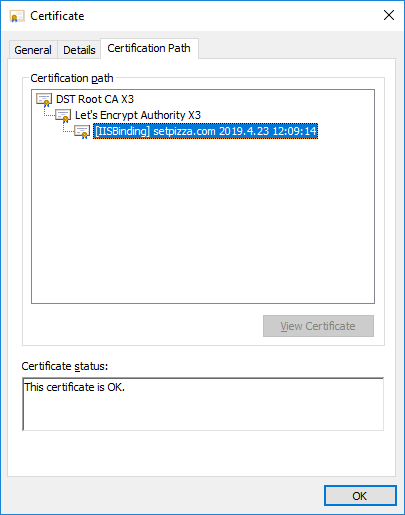
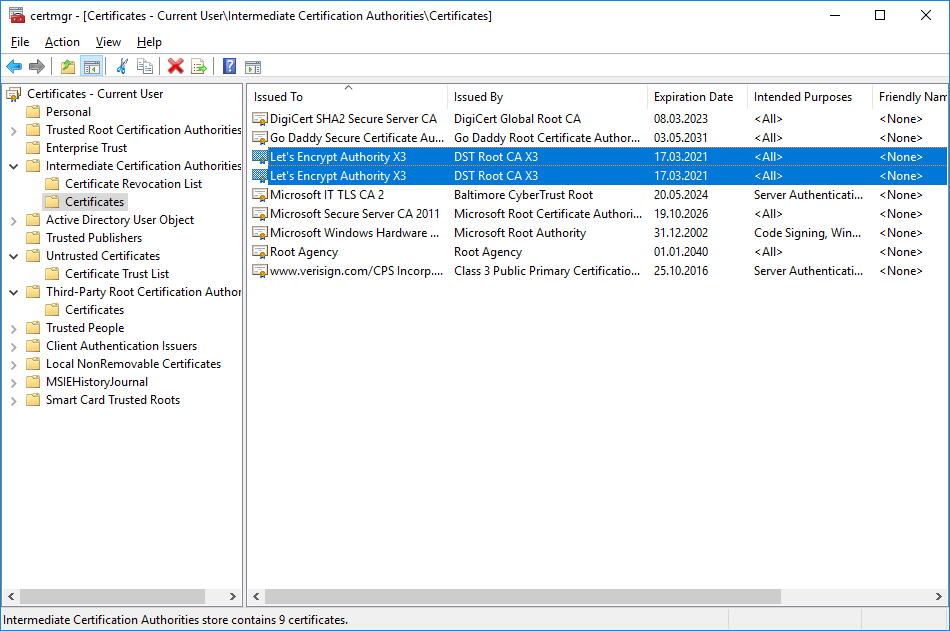
В хранилище сертификатов:
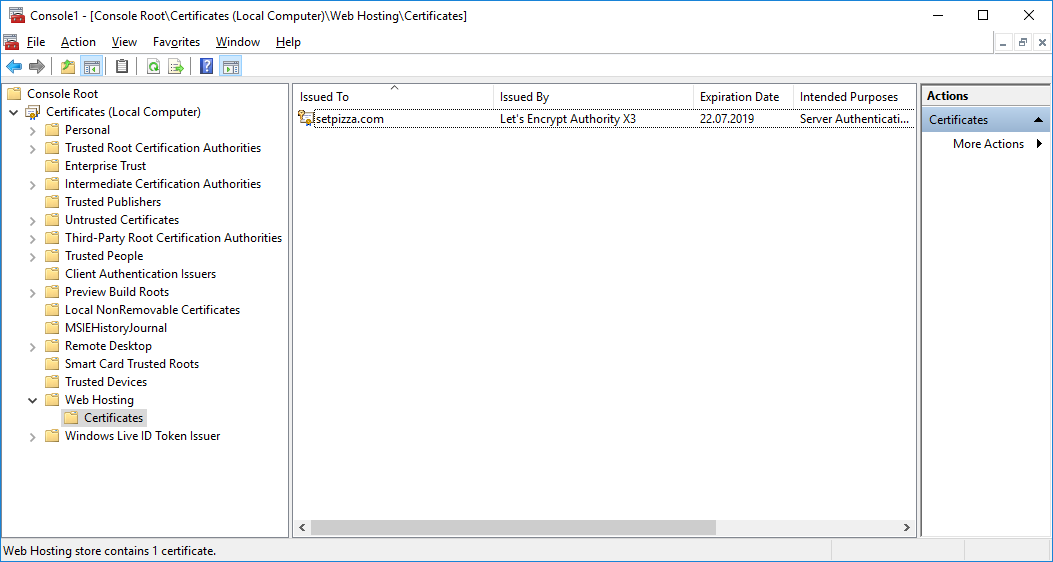
Let’s Encrypt устанавливает также сертификаты промежуточных центров сертификации.
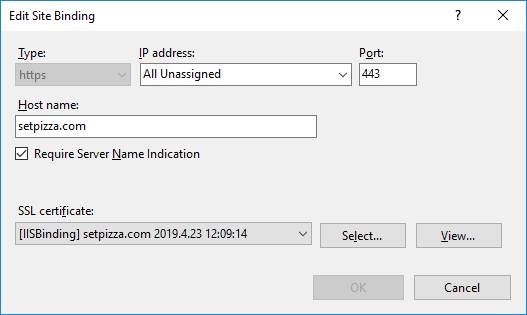
443 порт добавился автоматически, сертификат выбрался автоматически.
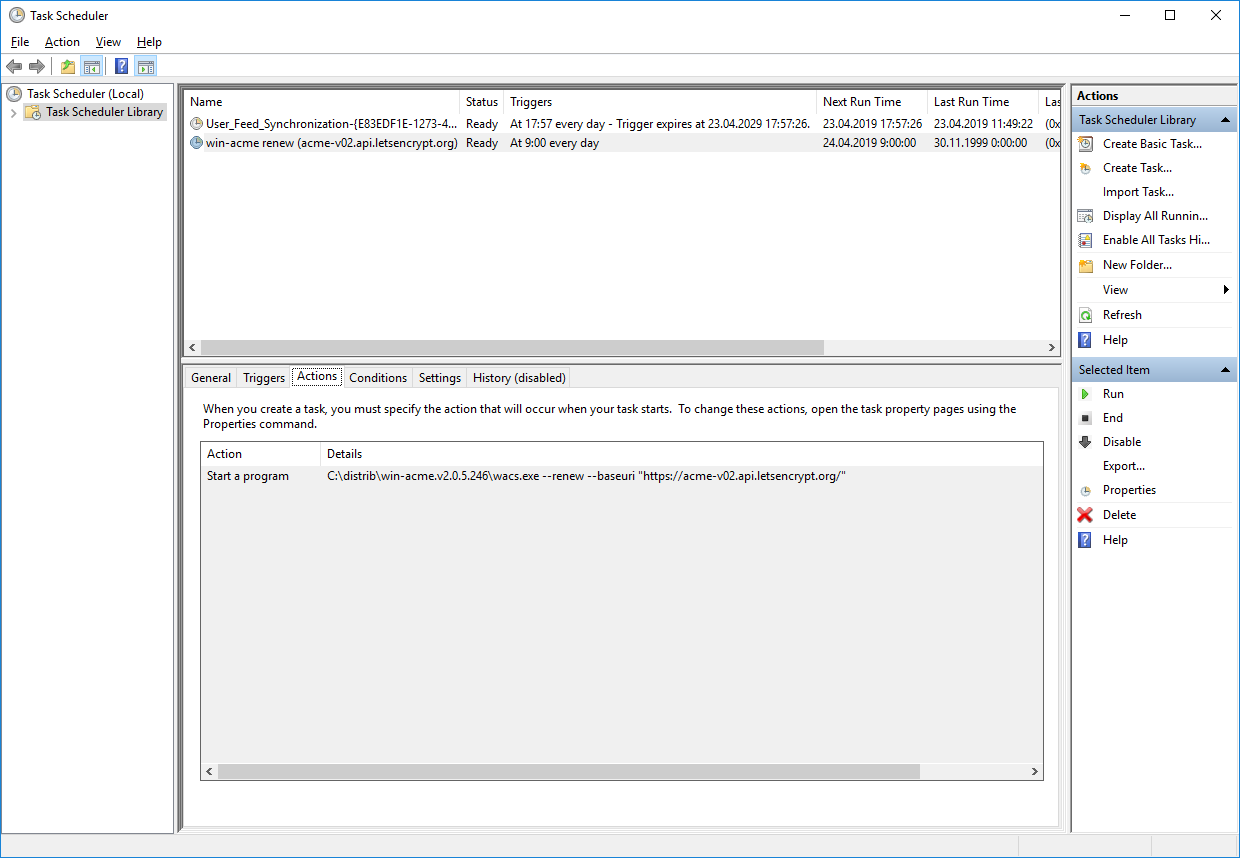
В планировщике добавилось ежедневное правило для обновления сертификатов.
Дополнительные настройки
Вы можете настроить почту для уведомлений.
Как нам подсказывают, нужно ручками подправить файл settings.config.
<setting name="SmtpServer" serializeAs="String">
  <value>localhost</value>
</setting>
<setting name="SmtpPort" serializeAs="String">
  <value>25</value>
</setting>
<setting name="SmtpUser" serializeAs="String">
  <value />
</setting>
<setting name="SmtpPassword" serializeAs="String">
  <value />
</setting>
<setting name="SmtpSecure" serializeAs="String">
  <value>False</value>
</setting>
<setting name="SmtpSenderName" serializeAs="String">
  <value>Let's Encrypt</value>
</setting>
<setting name="SmtpSenderAddress" serializeAs="String">
  <value>admin@yourdomain1.ru</value>
</setting>
<setting name="SmtpReceiverAddress" serializeAs="String">
  <value>admin@yourdomain2.ru</value>
</setting>
<setting name="EmailOnSuccess" serializeAs="String">
  <value>True</value>
</setting>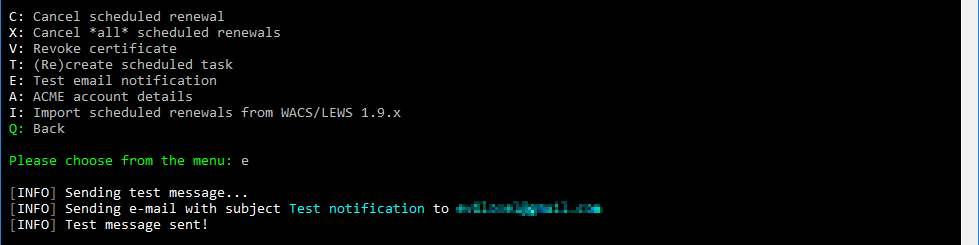
Лучше генерировать сертификаты с псевдонимами, например:
Принцип понятен, дальше разберётесь.
Оглавление
Что за сертификат Let’s Encrypt?
Куда и зачем мне нужен был SSL сертификат
Начнём с того, что SSL (Secure Sockets Layer) сертификат защищает данные пользователей, которые передаются по сети. Для интеграции с одним из известных маркетплейсов
мне нужно было использовать web-сервис 1С и на тестовом Windows Server, на котором был развёрнут тестовый сервер 1С, был поднят IIS (internet Information Services). Веб сервер Windows.
- Установка Windows Server
- Установка Ролей ISS и DNS
- Установка Сервера 1С
- Подключение модуля расширения веб-сервера
- Скачиваем программу LetsEncrypt для Windows
- Настраиваем DNS
- Настраиваем шлюз (в моём случае это был Kerio Control)
- Выпускаем SSL сертификат LetsEncrypt
- Проверяем привязку в Диспетчере служб IIS
- Проверяем планировщик заданий на наличие таска для перевыпуска сертификата
Установку Windows Server и сервера 1С я тут рассматривать не буду, так как. Во-первых Windows Server установка мало чем отличается от установки обычной десктопной винды,
а по 1С можно почитать эту статью. Во-вторых я хочу рассказать именно про то как установить SSL сертификат
от Let’s Encrypt на Windows Server IIS. Начнём!
Установка SSL сертификата на IIS
Скачиваем программу LetsEncrypt-Win-Simple
Для того чтобы выпустить сертификат на Windows Server IIS на необходима программа LetsEncrypt-Win-Simple. Качаем её на официальном сайте www.win-acme.com
Скачиваем и распаковываем архив в директорию на жёстком диске. Для выпуска сертификата нам нужно будет запустить из каталога файл wacs.exe. Но это чуть позже.
Если мы сейчас попытаемся выпустить сертификат, то получим предупреждение
No sites with host bindings have been configured in IIS. Add one in the IIS Manager or choose the plugin 'Manual input' instead.
Добавим веб-сайт в Диспетчере служб IIS
Запускаем Диспетчере служб IIS через панель управления — администрирование. Или через WIN + R
InetMgr.exe
Добавляем записи в Диспетчере DNS
Открываем Диспетчер DNS через команду выполнить WIN + R (или любым удобным для вас способом 😉 )
dnsmgmt.msc
Так как домен у меня находится у хостинг провайдера, то я на всякий случай указал в Диспетчере DNS его NS сервера. В свою очередь у хостинг провайдера прописываем A запись с
нашим выделенным IP адресом. Позже мы настроим правило для того чтобы входящее соединение перебрасывало на нужный сервер.
Выпуск SSL сертификата Let’s Encrypt
И так. У нас есть 1С сервер с расширением веб-сервера, добавили DNS и CNAME записи, указали A запись. Теперь запускаем WACS.EXE и вводим букву N для
инициирования выпуска сертификата. Далее выбираем на какой домен будем выпускать сертификат, даём пару соглашений (y) и вводим email адрес, куда нам будут приходить уведомления
в случае каких-либо проблем (Enter email for notifications about problems and abuse).
В принципе всё готово. По части сертификата. Программа автоматически добавляет привязку 443 SSL порта к сайту в Диспетчере служб IIS и в Планировщике заданий таск на автоматический перевыпуск сертификата, но можно в этом убедиться самостоятельно
Настройка шлюза (роутера)
I have recently been working on a project to build and deploy a Terminal Server for a client and configure an RD Gateway to allow for external contractors to use it.
After some internal discussion, it was decided that we would use a Let’s Encrypt SSL certificate for the gateway. One downside of using Let’s Encrypt however is that the certificates expire every 90 days. As such we needed to find a solution to automate the renewal process.
We settled on using an application called Certify the Web, a GUI which allows you to obtain a Let’s Encrypt certificate and have it renew automatically.
Prerequisites
-
Ensure you have set an FQDN for the RD Gateway server name (We’ll be using terminal.customer.domain for this example)
-
Create an A record in your public facing DNS point the gateway FQDN to your public IP address
-
Create a new zone & A record in your internal DNS pointing the servers FQDN it’s internal IP address.
-
Create a NAT rule in your firewall to forward TCP port 80 and 443 from the public IP address to the servers internal IP address.

Install Certify the Web
This will need to be installed onto your RDS server. If you downloaded it on this server then go ahead and install the application. If not, copy it to the correct server.
Configure Certify the Web
Once you have the application installed, go ahead and launch it. Immediately you will be asked for an email address contact. Provide desired email address, click the Yes I Agree option and then register.

When you are shown the main application interface, click on New Certificate.

On the Certificate Domains tab you will need to change the website in the dropdown to be the Default Web Site. In the Add Domains to certificate, enter the FQDN for the RD Gateway Server. Once done, click the Add Domains button.

Once you have added the domain, you will see a new row is added to the Certificate Domains tab. Confirm that the domain is there and then click the Authorization tab.

On the Authorization tab, there are 3 pieces of information which we need to provide, the Domain Match, Challenge Type and Website root directory.

Once these 3 field are completed, proceed to the Deployment tab. On this tab you will need to make sure that the Deployment Mode drop down is set to Single Site (Selected in Domains tab) and also ensure only the Binding hostname not specified (IP only or all Unassigned) option is set.


Handily, Certify the Web’s functionality can be expanded with PowerShell. The application is able to run PowerShell scripts both before and/or after renewal.
When running after renewal, the parameter $result can be passed through to PowerShell which can then used to do various things with the generated certificate. In our case, we will be using a script to update the certificate used by our different RDS roles.
param($result)set-alias ps64 "$env:C:\Windows\System32\WindowsPowerShell\v1.0\Powershell.exe"
$pfxpath = $result.ManagedItem.CertificatePath
Set-RDCertificate -Role RDPublishing -ImportPath $pfxpath -Force
Set-RDCertificate -Role RDWebAcces -ImportPath $pfxpath -Force
Set-RDCertificate -Role RDGateway -ImportPath $pfxpath -Force
Set-RDCertificate -Role RDRedirector -ImportPath $pfxpath -Force
Now we want to go back to our Certify the Web application. Check the Show Advanced Options button. This will add the Scripting tab. Go ahead and click on the Scripting tab.

Excellent, we’re now ready to request and generate our certificate. Go ahead and click the Request Certificate button.


Verify the Certificate Installation
Now that our certificate has been generated, we need to verify that it has been bound to the IIS site and installed into our RDS roles.
Firstly, go ahead and launch IIS. Expand the site tree and locate the site which we generated the certificate for. Right click on the site and click on Bindings.

You should be able to see the SSL certificate which we generated select in the drop down SSL certificate menu.

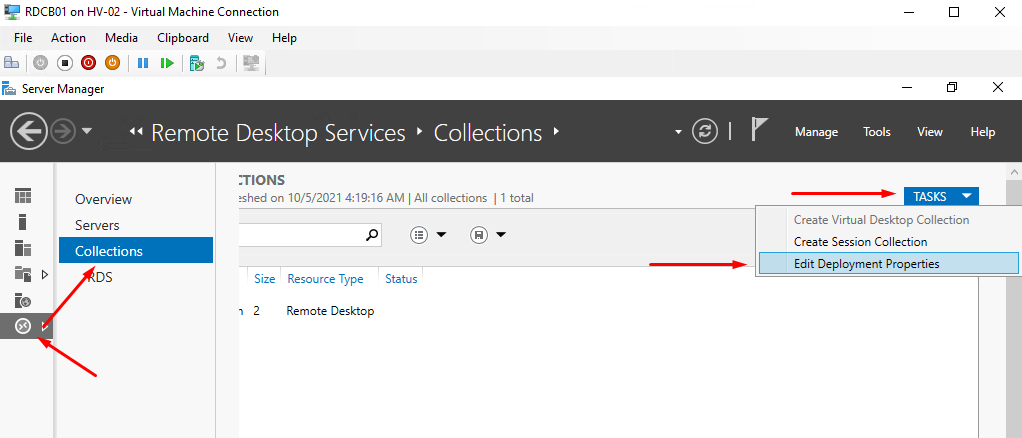
Finally we need to confirm that our RDS roles have been updated. Launch Server Manager and click on the Remote Desktop Services role.

Under the Deployment Overview section, go to Tasks -> Edit Deployment Properties.

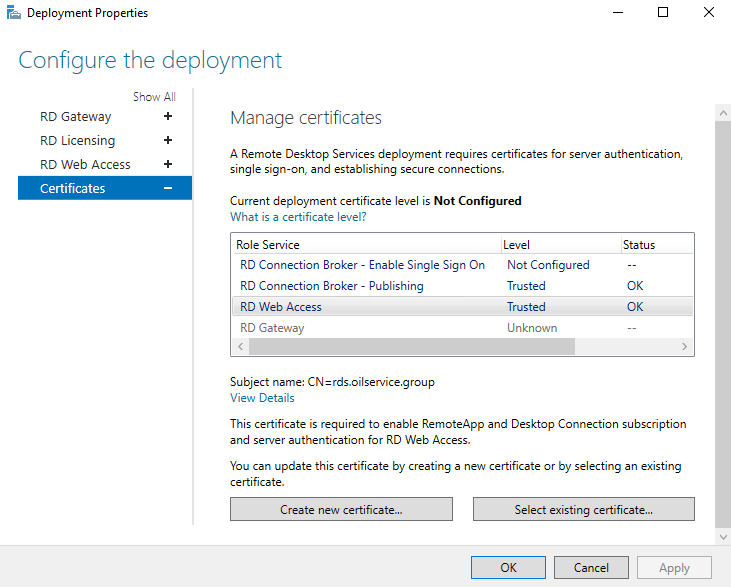
Go to the Certificate tabs. You should now be able to see all the RDS roles are trusted. Select each one and click View Details to confirm that our new certificate has been selected.

Fantastic! You have successfully configured and deployed a Let’s Encrypt certificate which will automatically renew itself, update the IIS bindings and install into your RDS roles.
Follow Us
Recent Posts
Сертификат Exchange Server не является доверенным
При установке нового сервера Exchange клиентское соединение устанавливается небезопасно. Это по умолчанию. Мы войдем в Outlook Web Access (OWA), чтобы посмотреть, как это выглядит.
В Google Chrome отображается предупреждение:
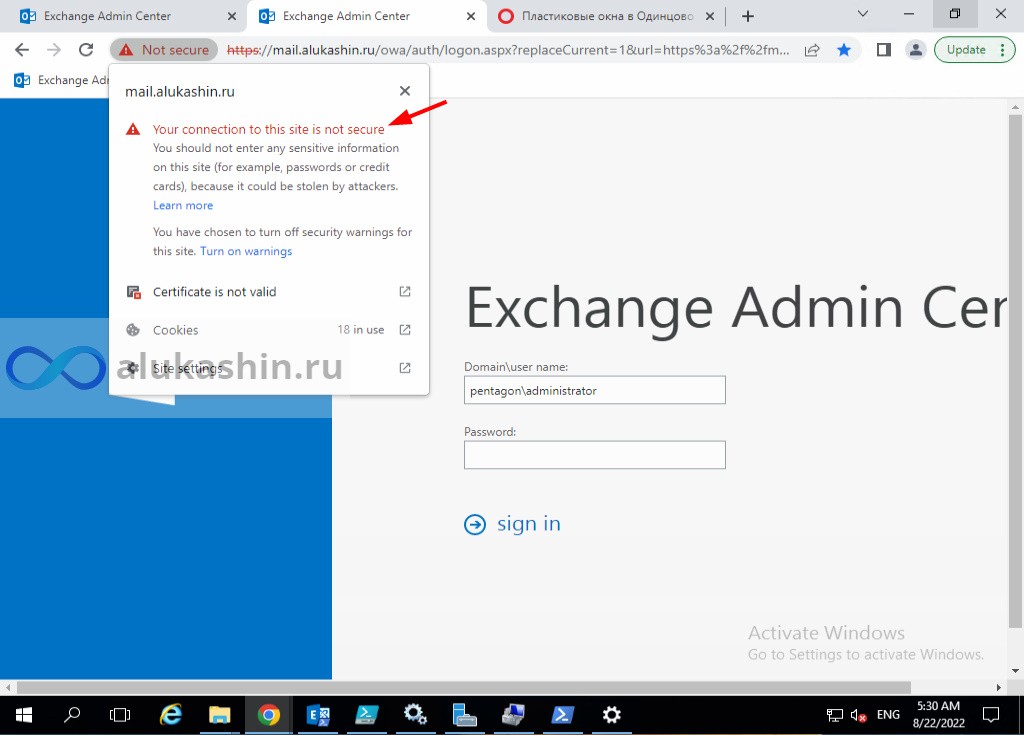
OWA сервера Exchange работает, но небезопасно. Значок замка показывает предупреждение. Если мы нажмем замок в адресной строке, мы увидим, что соединение не защищено.
То же самое происходит со всеми другими браузерами. Например, Internet Explorer показывает красную адресную строку. При нажатии на сертификат на панели инструментов показывает, что сертификат является несоответствующим адресом. Соединение с сервером Exchange не защищено.
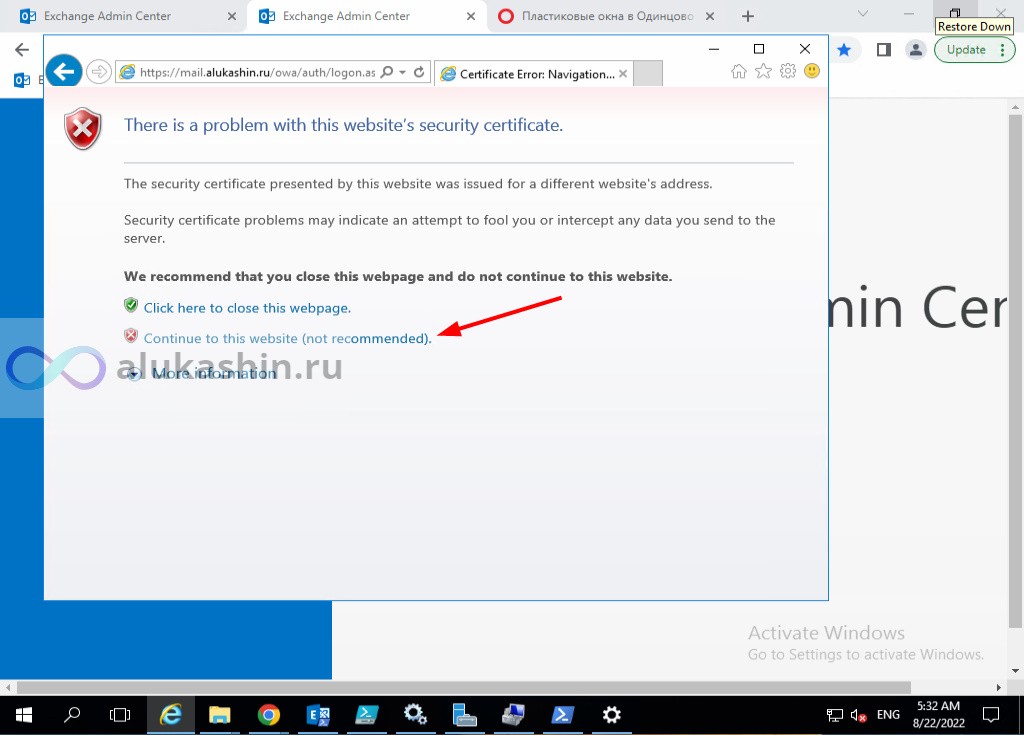
Мы узнали о Let’s Encrypt и увидели, что подключение к Exchange Server не является безопасным. В следующей части мы подготовим приложение для настройки сертификата. После этого мы запросим бесплатный сертификат Let’s Encrypt.
WACS Clint to Install Let’s Encrypt TLS Certificate in IIS on Windows Server
The easiest way to get an SSL certificate from Let’s Encrypt is to use the console tool Windows ACME Simple (WACS) (previously this project called LetsEncrypt-Win-Simple). It is a simple wizard that allows you to select one of the websites running on the IIS, automatically issue and bind an SSL certificate to it.
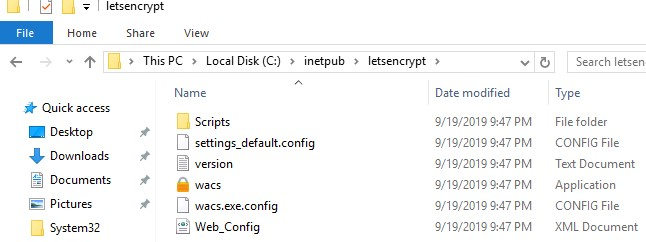
Open the elevated command prompt, go to c:\inetpub\letsencrypt directory and run wacs.exe. This will launch an interactive Let’s Encrypt certificate generation and binding to IIS site wizard. To quickly create a new certificate, select N: – Create new certificates (simple for IIS).
Next, you need to select the certificate type. In our example, there is no need to use a certificate with aliases (multiple SAN – Subject Alternative Name), so just select an item 1. Single binding of an IIS site. If you need a Wildcard certificate, select the option 3.
Then the utility displays the list of websites running on IIS and prompts you to select a site to issue the certificate for.
Specify your email address to which notifications about certificate renewing problems and other critical messages and abuses will be sent (you can specify multiple email addresses separated by commas). It remains to agree to the terms of use and Windows ACME Simple will connect to Let’s Encrypt servers and try to automatically generate a new SSL certificate for your website.

The process of generating and installing SSL Let’s Encrypt certificate for IIS is fully automated.
In IIS Manager, open the Site Binding settings for your website and verify that it uses the certificate issued by Let’s Encrypt Authority X3.

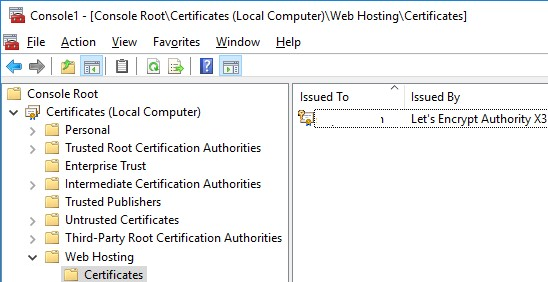
You can find the Let’s Encrypt IIS certificate in the computer certificate store under Web Hosting -> Certificates.
Let’s Encrypt and ACME Clients for Windows
The Let’s Encrypt API interface to automatically issue the certificates is called Automated Certificate Management Environment (ACME) API. There are 3 most popular ACME API client implementations for Windows systems:
- Windows ACME Simple (WACS) is the command prompt tool for the interactive issue an SSL certificate and bind it to a specific site on your IIS web server;
- Powershell ACMESharp module – is the PowerShell library with a number of cmdlets to interact with Let’s Encrypt servers over ACME API;
- Certify is a Windows graphics tool to manage SSL certificates interactively using ACME API.
Тестируем подключение.
1. Заходим на RdWeb. Видим, что проблем с сертификатом ни каких нет. Соединение защищено.

2. Давайте перед входом откроем скачанный RDP ярлык с RDWEB и посмотрим что там интересного:
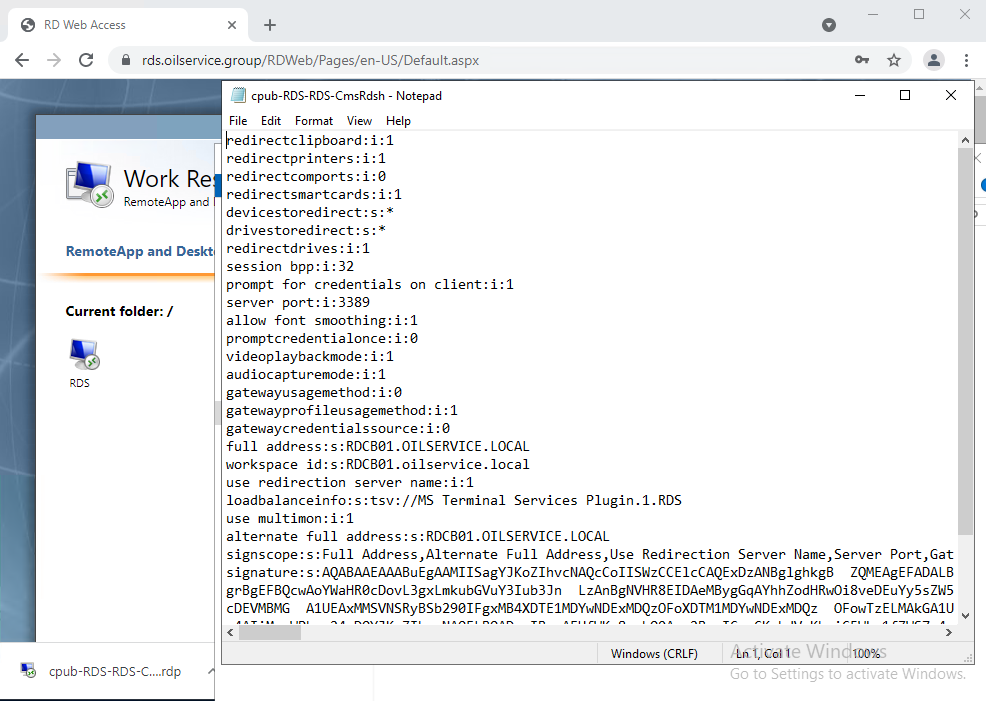
- Есть full address, имя, на которое происходит соединение.
- loadbalanceinfo говорит, что при соединении, Брокер нас направит на член RDSH в коллекции RDS.
- signature – ярлык подписан SSL сертификатом, потому любой компьютер будет ему доверять и мы не получим лишние предупреждение о недоверенном издателе:
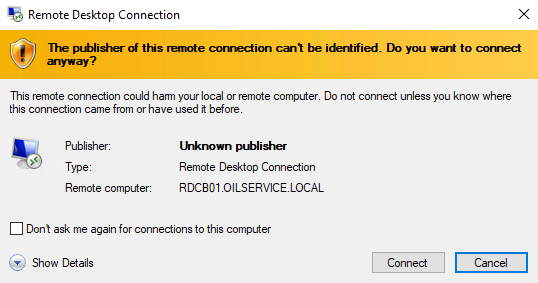
3. Пробуем произвести соединение:
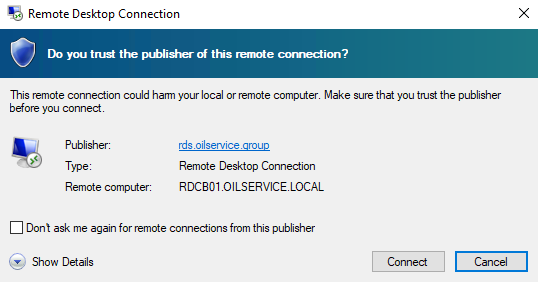
Данное предупреждение by design. Функция безопасности.
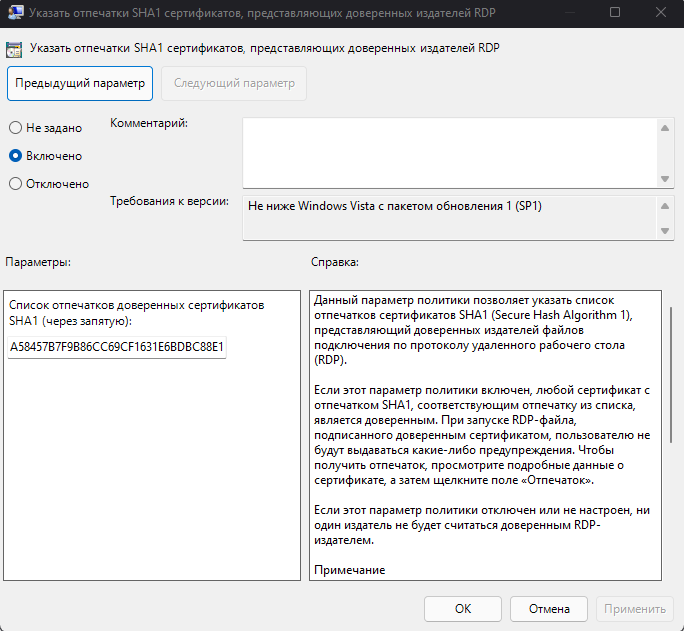
Данное предупреждение в домене можно убрать с помощью групповой политики:
Указать отпечатки SHA1 сертификатов, представляющих доверенных издателей RDP
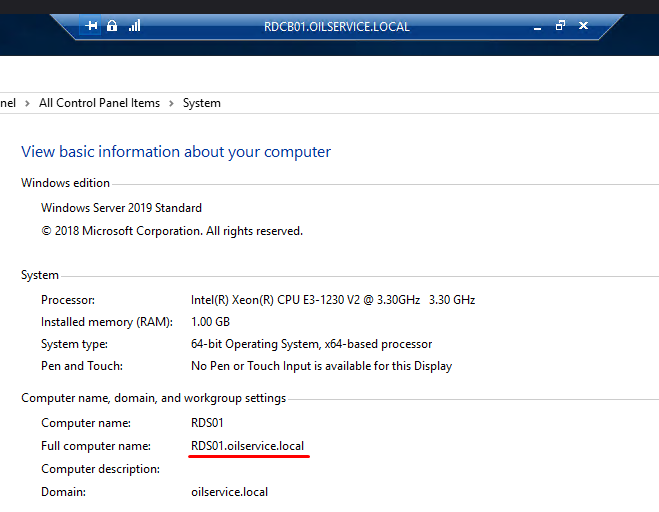
4. Как видно, Брокер нас перенаправил на RDS01.
Подготовка с работой Let’s Encrypt Win-ACME
Существует список клиентов ACME, предлагаемых третьими лицами для использования. Мы собираемся использовать Windows ACME Simple (WACS). Простой клиент ACME для Windows — для использования с Let’s Encrypt. Он автоматически обновит ваши сертификаты, поэтому после его установки и настройки у вас будет постоянно защищенный веб-сервер.
Загрузите Win-ACME с GitHub или официального сайта .
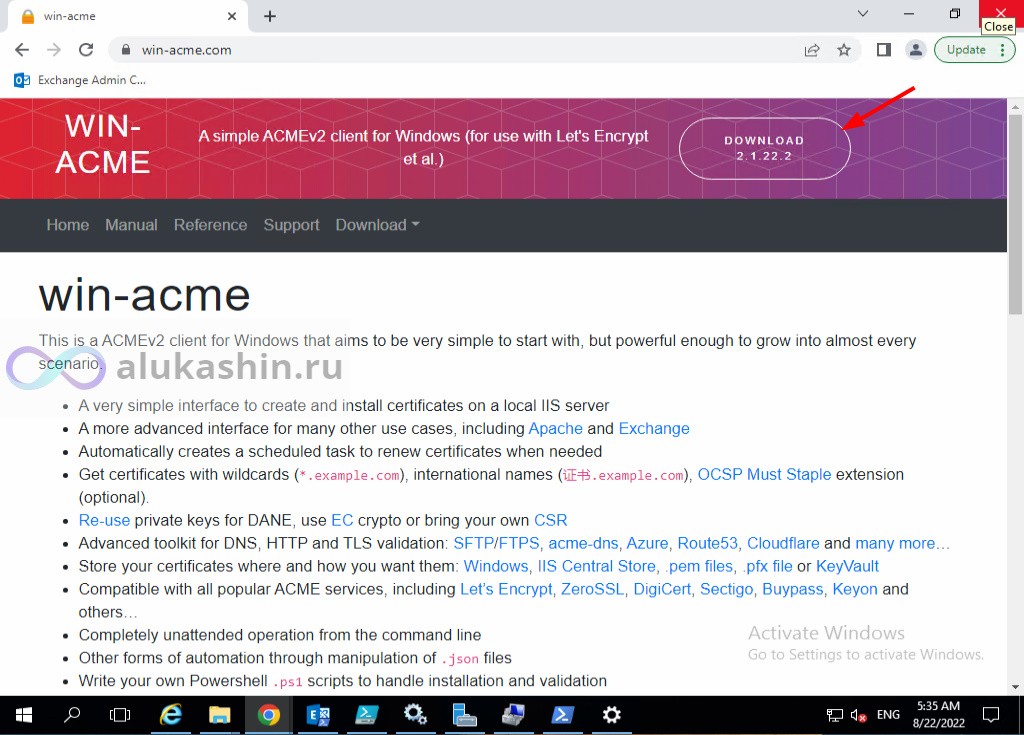
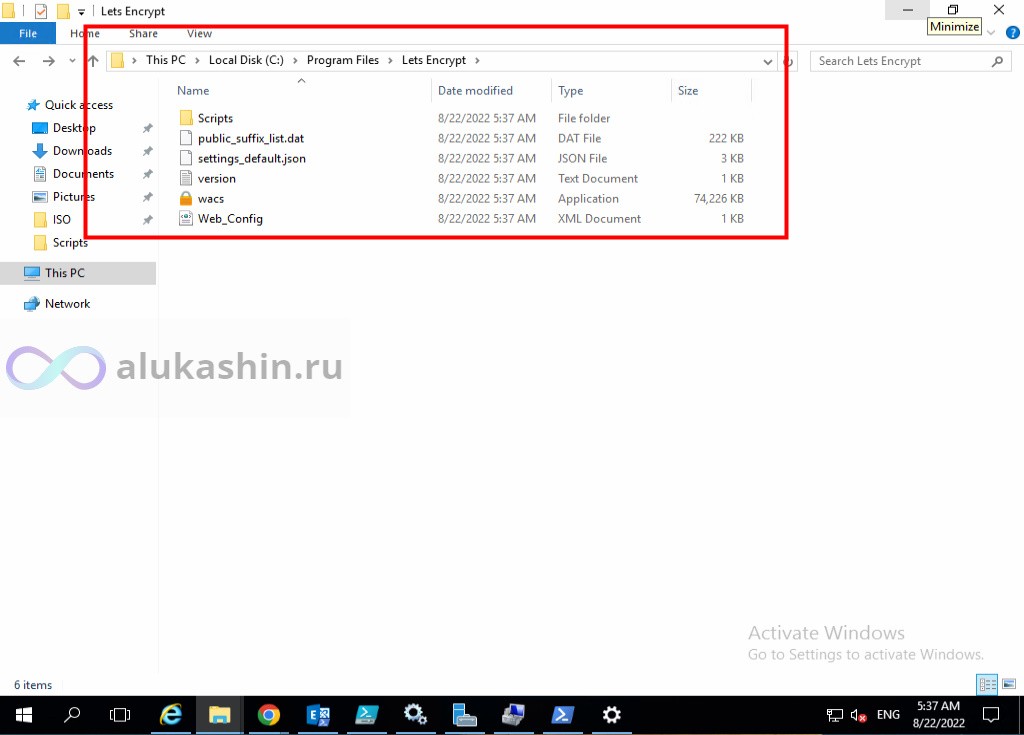
На момент написания файла это win-acme.v2.1.22.1289.x64.pluggable.zip. Создайте папку Lets Encrypt в папке C:\Program Files. Извлеките файлы из архива .zip в папку C:\Program Files\Lets Encrypt.
Вы можете использовать Win-ACME из интерактивного меню или в автоматическом режиме (командная строка). С командной строкой вам не нужно прыгать по меню. Оба будут работать, и хорошо учиться обоим способам.
Установка сертификата на сервисы.
1. Заходим в оснастку конфигурации коллекции.
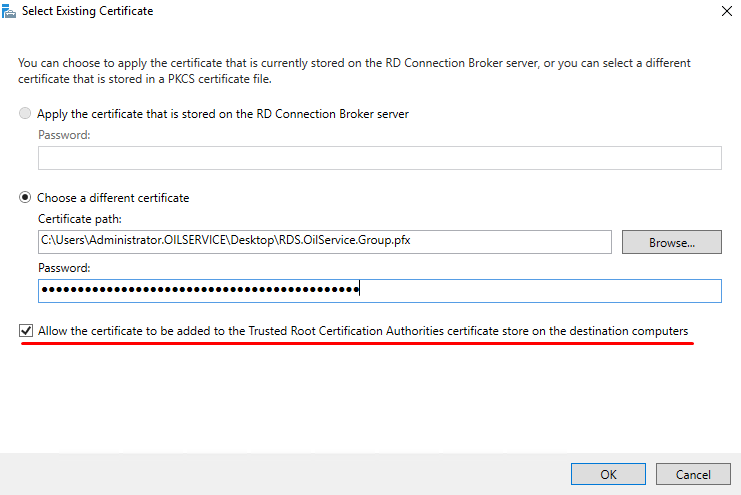
2. Применяем наш сертификат для сервисов:
RD Connection Broker – Publishing
RD Web Access.
Enable Single Sign On – нас пока не интересует.

3. Поставим чекбокс: Allow the certificate to be added to the Trusted Root Certification Authorities certificate store on the destination computers – для возможности установки сертификата на другие компьютеры с данной ролью. Это было бы справедливо с участием второго брокера в режиме высокой доступности.
4. Как видно, всё прошло успешно.
Create the Web Application
- Using Windows Explorer, create a new folder in the default IIS web server directory to store your domain’s web files. For example, you could create a folder named
C:\inetpub\example.com. - Press Control + R on your keyboard to open the run utility, and enter
notepadin the text field. -
<html>
  <head>
    <title>Hello World</title>
  </head>
    <body>
      <h1>Hello World!</h1>
    </body>
</html>
Save the file as index.html in your domain files directory. For example: C:\inetpub\example.com\index.html
Setup the IIS Site with your Domain Name
- Open the Windows start menu and navigate to the Windows Administrative Tools subgroup.
- Select Internet Information Services (IIS) Manager from the list.
- In the IIS Manager Window, click > next to your server name to expand the list.
-
Expand Sites, and click Add Website on the right Actions bar.

-
Enter your Web Application name in the Site Name: field.
- Under Content Directory, click
...to browse and set the Physical path: to your domain web files directory. - Keep
httpas the Type under Binding, and80as the port. - To assign your domain a specific IP address, select it from the drop-down list, or keep All Unassigned to use all Server IP addresses.
- Enter your domain name in the Hostname: field.
- Click OK to save changes and automatically start the website.
-
Visit your domain to confirm successful integration.
http://example.comThe hello world HTML application should display.
Request and Install a Certificate
You can install a certificate with either Certbot or the Win-acme client. Please review both sections below before choosing an installation method.
Option 1: Install with Certbot
Option 2: Install with Win-acme Client
- Extract files from the downloaded win-acme zip archive.
- Navigate to the extracted folder and open the
wacs.exeapplication. - Click More info in the Windows Defender SmartScreen pop-up window, and Run anyway.
- In the open command prompt console, enter N to create a new SSL certificate with default options.
- Select your target IIS domain to install the SSL certificate on.
- Enter A to use all bindings of the IIS domain.
- Enter
y' to continue with your selection,y’ to open with the default web server application, `y’ to agree to the Let’s Encrypt terms. - Enter your email address to receive important certificate notifications.
- Your SSL Certificate is automatically stored in the IIS certificate store and registered for your domain name.
-
https://example.com
Давайте зашифруем закрытый ключ сертификата
Лучше всего экспортировать сертификат после его выпуска и загрузки из Let’s Encrypt. Это означает, что вы должны импортировать закрытый ключ сертификата, чтобы экспортировать сертификат. Есть два способа сделать это.
Автоматический импорт закрытого ключа сертификата
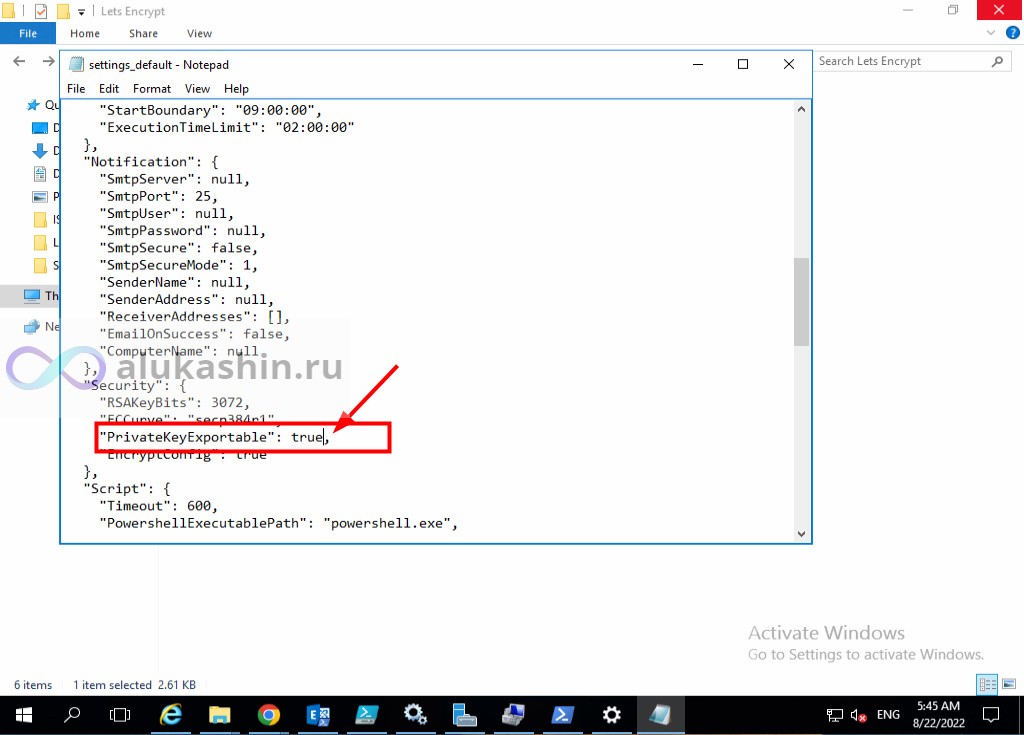
Настройте settings_default.json, прежде чем запрашивать сертификат у Let’s Encrypt. Это автоматически импортирует закрытый ключ сертификата в сертификат:
- Запустите проводник
- Перейдите по пути C:\Program Files\Lets Encrypt
- Откройте settings_default.json с помощью Блокнота.
- Установите для PrivateKeyExportable значение true
- Сохраните файл
Файл settings_default.json будет скопирован вместе с его настройками в settings.json после запуска Win-ACME. Если вы уже запускали Win-ACME, в папке вы увидите файл settings.json . Отредактируйте значение в settings.json .
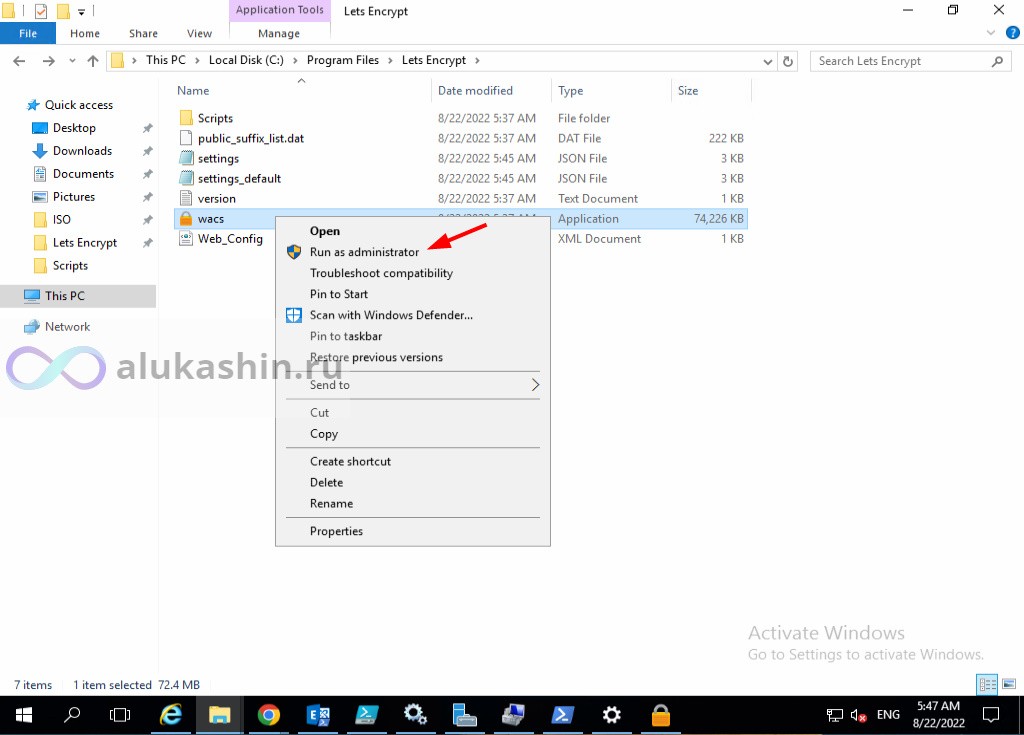
Щелкните правой кнопкой мыши приложение wacs . Нажмите « Запуск от имени администратора» , чтобы запустить приложение.
Появится окно клиента Win-ACME. Введите M , чтобы создать сертификат продления (полный вариант), и нажмите Enter .
 A simple Windows ACMEv2 client (WACS)
 Software version 2.1.22.1289 (release, pluggable, standalone, 64-bit)
 Connecting to https://acme-v02.api.letsencrypt.org/...
 Connection OK!
 Scheduled task not configured yet
 Please report issues at https://github.com/win-acme/win-acme

 N: Create certificate (default settings)
 M: Create certificate (full options)
 R: Run renewals (0 currently due)
 A: Manage renewals (0 total)
 O: More options...
 Q: Quit

 Please choose from the menu: M
Введите 2 для ручного ввода и нажмите Enter .
Running in mode: Interactive, Advanced
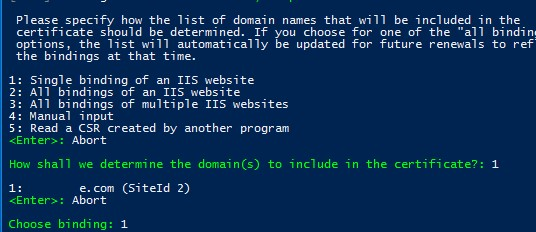
Please specify how the list of domain names that will be included in the
certificate should be determined. If you choose for one of the "all bindings"
options, the list will automatically be updated for future renewals to
reflect the bindings at that time.
1: Read bindings from IIS
2: Manual input
3: CSR created by another program
C: Abort
How shall we determine the domain(s) to include in the certificate?: 2
Введите список имен хостов через запятую. Посмотрите на свои имена хостов Exchange и заполните их. Правильно ли вы настроили имена хостов Exchange Server? Внутренних имен быть не должно, например MBX1. Ознакомьтесь со статьей Проектирование и планирование пространства имен Exchange . Я рекомендую использовать одно и то же пространство имен для внутреннего и внешнего DNS.
В моем примере я буду использовать *.alukashin.ru После этого нажмите Enter .
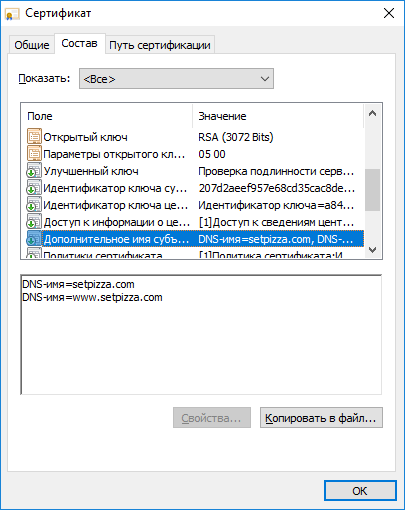
Помимо перечислений имен в SAN сертификата, мы можем указать и wildcard , через wildcard мы покроем все имена 3 уровня , запись будет выглядить типа *.alukashin.ru . Получается что
Для установки SAN сертификата для двух имен мы перечисляем имена.
Для того чтобы произвести установку wildcard ssl сертификата в exchange 2016 мы ставим со *.domain.com
В данном примере мы выберем SAN серитфикат, в последующем мы установим сетификат на exchange 2016.
Description:        A host name to get a certificate for. This may be a
                     comma-separated list.

 Host: mail.alukashin.ru,autodiscover.alukashin.ru  или *.alukashin.ru
Мы не будем ничего вводить для предлагаемого понятного имени. Нажмите Enter , чтобы продолжить.
 Source generated using plugin Manual: mail.alukashin.ru and 1 alternatives

 Friendly name '[Manual] mail.alukashin.ru'. <Enter> to accept or type desired name: <Enter>
Проверку выполним по dns txt записи под номером 6
The ACME server will need to verify that you are the owner of the domain
 names that you are requesting the certificate for. This happens both during
 initial setup *and* for every future renewal. There are two main methods of
 doing so: answering specific http requests (http-01) or create specific dns
 records (dns-01). For wildcard domains the latter is the only option. Various
 additional plugins are available from https://github.com/win-acme/win-acme/.

 1: [http-01] Save verification files on (network) path
 2: [http-01] Serve verification files from memory
 3: [http-01] Upload verification files via FTP(S)
 4: [http-01] Upload verification files via SSH-FTP
 5: [http-01] Upload verification files via WebDav
 6: [dns-01] Create verification records manually (auto-renew not possible)
 7: [dns-01] Create verification records with acme-dns (https://github.com/joohoi/acme-dns)
 8: [dns-01] Create verification records with your own script
 9: [tls-alpn-01] Answer TLS verification request from win-acme
 C: Abort

 How would you like prove ownership for the domain(s)?: 6
Введите 2 для ключа RSA и нажмите Enter .
After ownership of the domain(s) has been proven, we will create a
 Certificate Signing Request (CSR) to obtain the actual certificate. The CSR
 determines properties of the certificate like which (type of) key to use. If
 you are not sure what to pick here, RSA is the safe default.

 1: Elliptic Curve key
 2: RSA key
 C: Abort
Выберите вариант 3 , чтобы сохранить сертификат в хранилище сертификатов Windows, и нажмите Enter .
When we have the certificate, you can store in one or more ways to make it
accessible to your applications. The Windows Certificate Store is the default
location for IIS (unless you are managing a cluster of them).
1: IIS Central Certificate Store (.pfx per host)
2: PEM encoded files (Apache, nginx, etc.)
3: PFX archive
4: Windows Certificate Store
5: No (additional) store steps
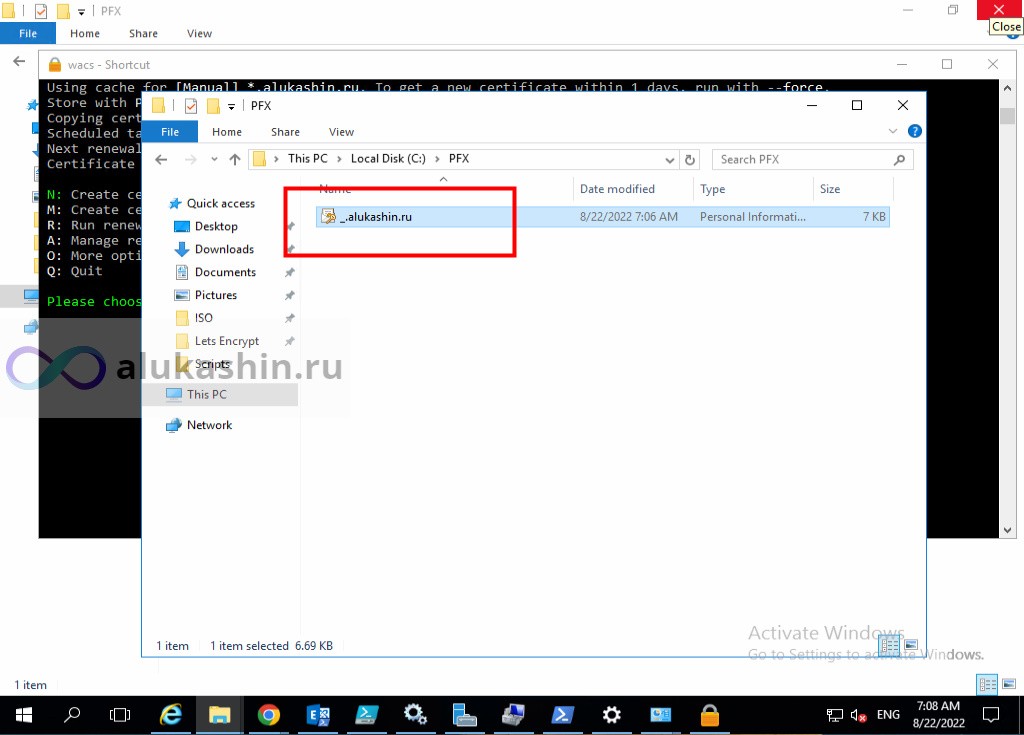
How would you like to store the certificate?: 3Создадим в корне диска C:\ папку PFX
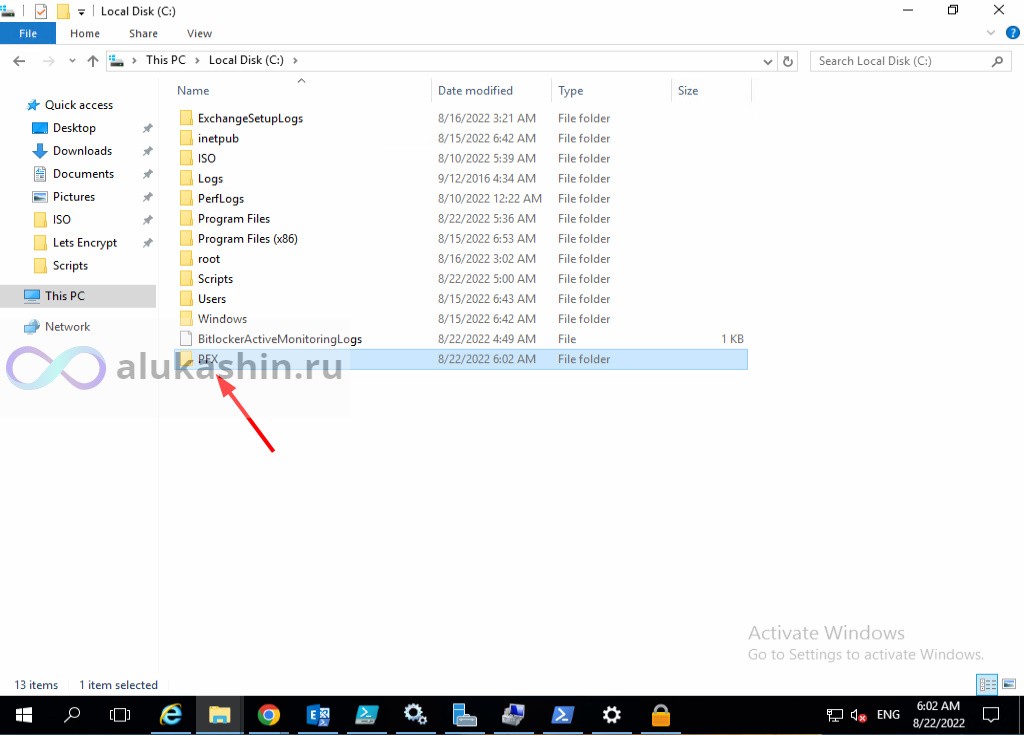
Укажем данный путь
 How would you like to store the certificate?: 3

 Description:        Path to write the .pfx file to.

 File path: C:\PFX
Нам предлагают защитить наш серфикат паролем, я откажусь , нажатием 1
Description:        Password to set for .pfx files exported to the folder.

 1: None
 2: Type/paste in console
 3: Search in vault

 Choose from the menu: 1
 1: IIS Central Certificate Store (.pfx per host)
 2: PEM encoded files (Apache, nginx, etc.)
 3: PFX archive
 4: Windows Certificate Store
 5: No (additional) store steps

 Would you like to store it in another way too?: 5
Installation plugin IIS not available: This step cannot be used in combination with the specified store(s)
With the certificate saved to the store(s) of your choice, you may choose one
or more steps to update your applications, e.g. to configure the new
thumbprint, or to update bindings.
1: Create or update bindings in IIS
2: Start external script or program
3: No (additional) installation steps
Which installation step should run first?: 3Пишем Y , принимаем лицензионное соглашение
 Which installation step should run first?: 3

 Terms of service:   C:\ProgramData\win-acme\acme-v02.api.letsencrypt.org\LE-SA-v1.2-November-15-2017-w-v1.3-notice.pdf

 Open in default application? (y/n*)

Do you agree with the terms? (y*/n) - yes
Введите свой адрес электронной почты и нажмите Enter .
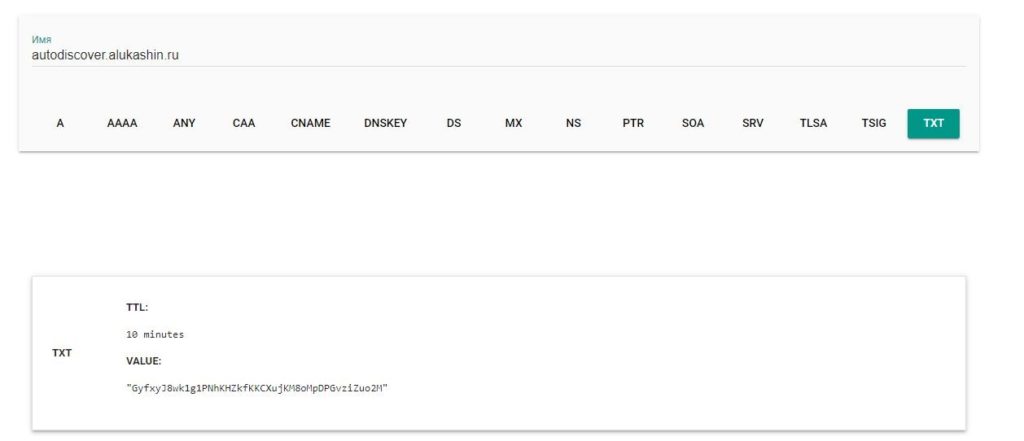
Enter email(s) for notifications about problems and abuse (comma-separated): administrator@alukashin.ruВывод покажет, что нам нужно подключится ко внешнему DNS и вручную создать TXT запись
[*.alukashin.ru] Authorizing...
 [*.alukashin.ru] Authorizing using dns-01 validation (Manual)

 Domain:             alukashin.ru
 Record:             _acme-challenge.alukashin.ru
 Type:               TXT
 Content:            "_UGiCVfFAkQDLjqPFTYJm1Xi0n9AS9ro8YShjKPQzAI"
 Note:               Some DNS managers add quotes automatically. A single set
                     is needed.

 Please press <Enter> after you've created and verified the record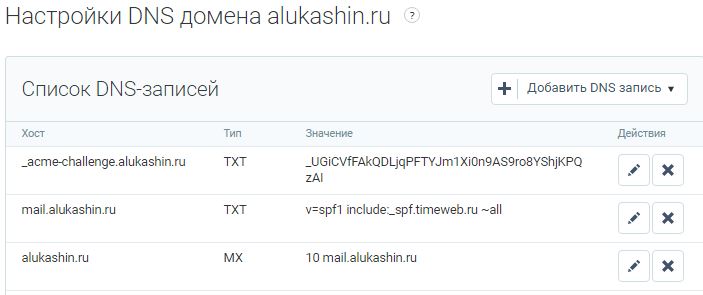
После публикации записи нам нужно подождать пока dns отреплицируется. Для проверки можно использовать инструмент от Google — Google DIG.
После того как запись стало видно можно нажать Enter в поле окна WACS
Если валидация прошла успешно , он потребует удалить запись из внешнего dns , через google dig посмотрите прошла ли репликация, позже нажмите enter , как запись пропадет , можете нажать Enter.
[*.alukashin.ru] Authorizing...
 [*.alukashin.ru] Authorizing using dns-01 validation (Manual)

 Domain:             alukashin.ru
 Record:             _acme-challenge.alukashin.ru
 Type:               TXT
 Content:            "_UGiCVfFAkQDLjqPFTYJm1Xi0n9AS9ro8YShjKPQzAI"
 Note:               Some DNS managers add quotes automatically. A single set
                     is needed.

 Please press <Enter> after you've created and verified the record

 [*.alukashin.ru] Preliminary validation succeeded
 [*.alukashin.ru] Preliminary validation succeeded
 [*.alukashin.ru] Authorization result: valid

 Domain:             alukashin.ru
 Record:             _acme-challenge.alukashin.ru
 Type:               TXT
 Content:            "_UGiCVfFAkQDLjqPFTYJm1Xi0n9AS9ro8YShjKPQzAI"

 Please press <Enter> after you've deleted the record
Сертификат будет ждать вас в папке.
В следующей статье мы разберем как установить сертификат на Exchange 2016
Prerequisites
- From the Windows start menu, open Server Manager.
- Click Add roles and features.
- Select Role-based or feature-based installation, and choose your server.
- Scroll through Server Roles and click Web Server (IIS).
- Add any additional IIS features you wish to install.
- Click Install to start the installation process.
-
Test your IIS installation by visiting your public server IP address.
http://192.0.2.123The default IIS welcome web page should display.
Redirect from HTTP to HTTPS Using the IIS URL Rewrite
<system.webServer>
<rewrite>
<rules>
<rule name=”HTTP to HTTPS Redirect” enabled=”true” stopProcessing=”true”>
<match url=”(.*)” />
<conditions>
<add input=”{HTTPS}” pattern=”off” ignoreCase=”true” />
</conditions>
<action type=”Redirect” url=”https://{HTTP_HOST}/{R:1}” appendQueryString=”true” redirectType=”Permanent” />
</rule>
</rules>
</rewrite>
</system.webServer>
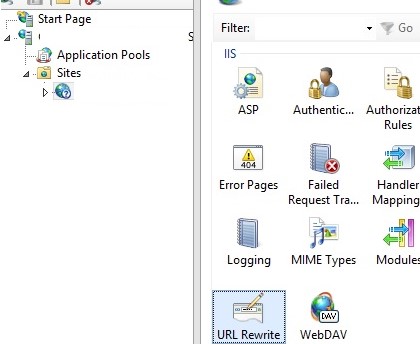
You can also configure traffic redirect using the URL Rewrite extension through the IIS Manager GUI. Select Sites -> yoursitename -> URL Rewrite.
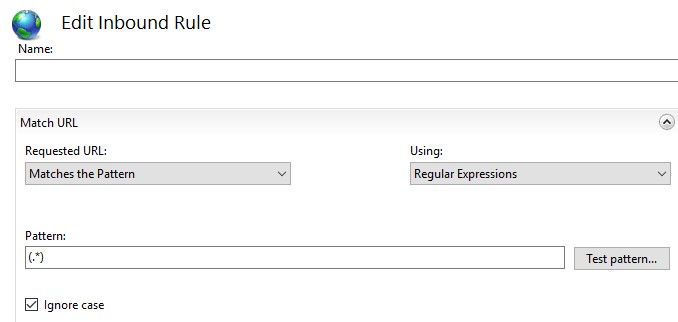
Create a new rule Add Rule -> Blank rule.
- Requested URL: Matches the Pattern
- Using: Regular Expressions
- Pattern: (.*)
- Condition input: {HTTPS}
- Check if input string: Matches the Pattern
- Pattern: ^OFF$
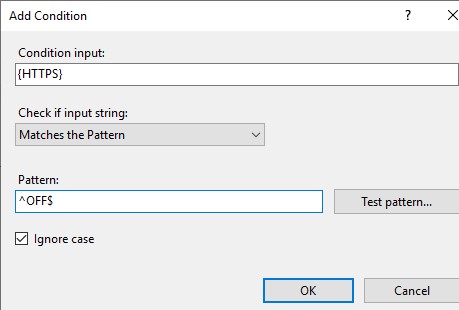
- Action Type: Redirect
- Redirect URL: https://{HTTP_HOST}/{R:1}
- Redirect type: Permanent (301)
Выпуск Let’s Encrypt сертификата.
Как Вы знаете, мы не можем включить в коммерческий сертификат внутреннее имя локального домена.
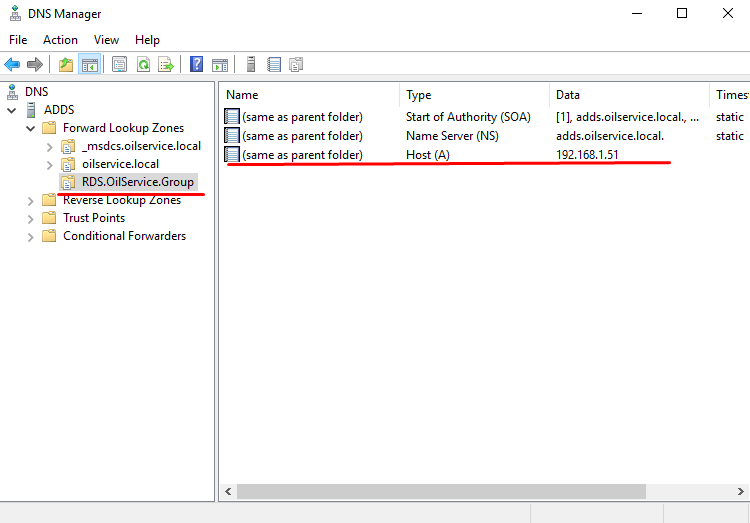
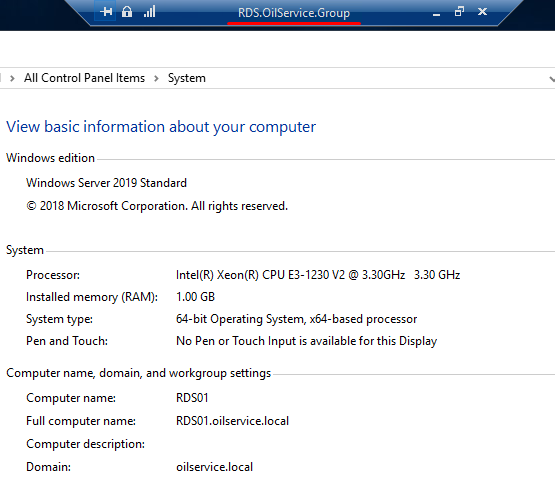
Мой внутренний домен: OilService.Local
Внешний: OilService.Group.
1. Для подключение к терминальной ферме я выберу более красивое имя: RDS.OilService.Group.
Так как у меня внутри домена нет этого имени, мы создаем новую зону просмотра и сделаем разрешение в IP адрес Брокера этого имени:
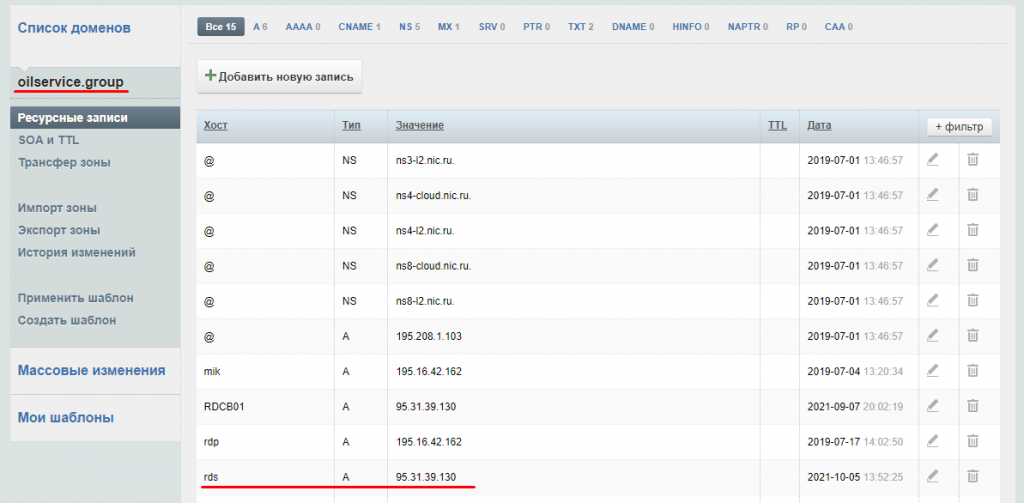
2. Создаем такое же имя на внешнем DNS Хостинге. В моем случае на nic.ru.
Распаковываем и кладем допустим на диск C:\
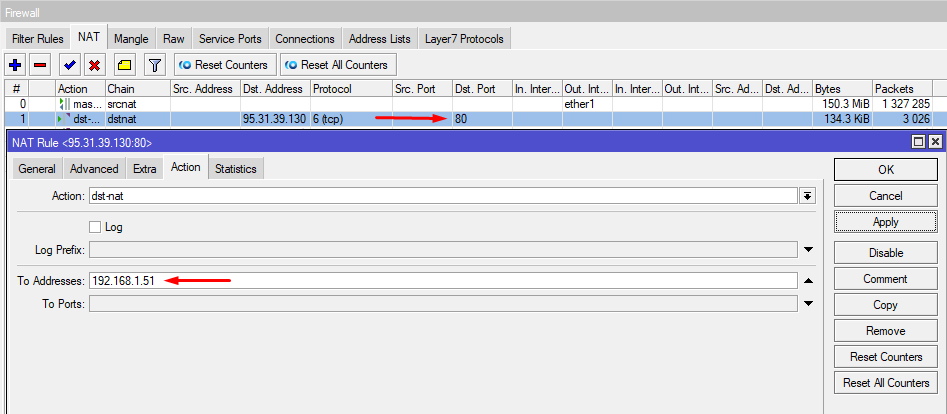
Далее нам нужно на нашем роутере открыть 80 порт для Брокера, так как Let’s Encrypt проводит проверку вэб сервиса. Я на своем роутере Mikrotik пробрасываю на IP адрес Брокера 80 порт.
4. Выпускаем сам сертификат:
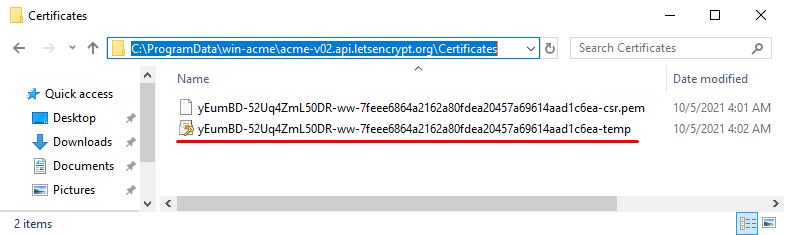
Сертификат в формате PFX сохранился в папке: C:\ProgramData\win-acme\acme-v02.api.letsencrypt.org\Certificates
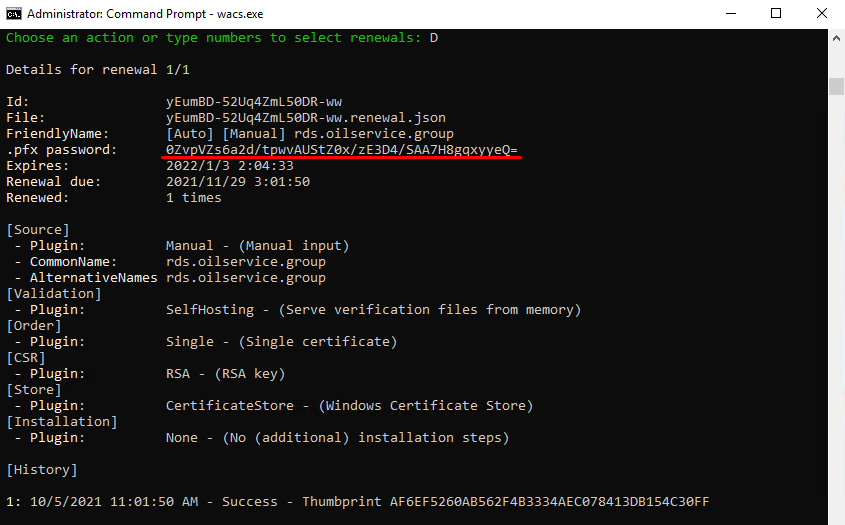
А его пароль можем узнать из wacs. A: Manage renewals (1 total) -> D: Show details for the renewal
В лабораторной среде мне не нужно автоматически устанавливать сертификат на все сервисы и автоматизировать процесс перевыпуска, но в продуктивной среде я пользуюсь такой командой:
Таким образом сертификат создается и привязывается автоматически ко всем сервисам RDS. В планировщике создается задача на перевыпуск. Можете спать спокойно.
Чтобы этот сценарий работал, закрытый ключ сертификата должен быть помечен как экспортируемый. Набор
PrivateKeyExportableвsettings.jsonкtrue.
Newsletter
Interested in becoming a part of our growing community?
Keep up with our events, best practices, news, tech articles and more.
Ссылки
IIS — SSL сертификат Let’s Encrypt
hMailServer — большой обзор
Получение сертификатов
web-сайт
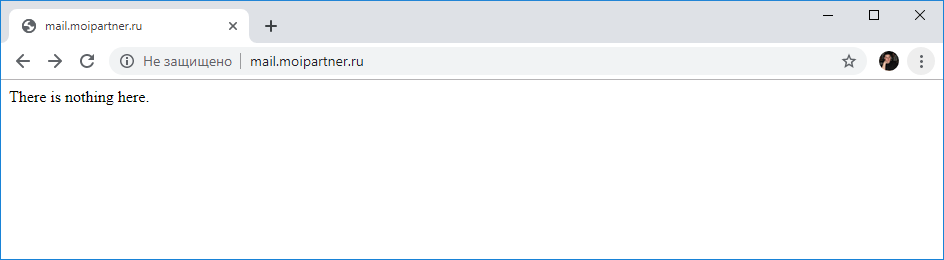
Заводим на IIS сайт c адресом почтового сервера. Естественно, делаем всё это на сервере, где крутится hMailServer. Создаём там любую страничку index.html для проверки работы сайта.
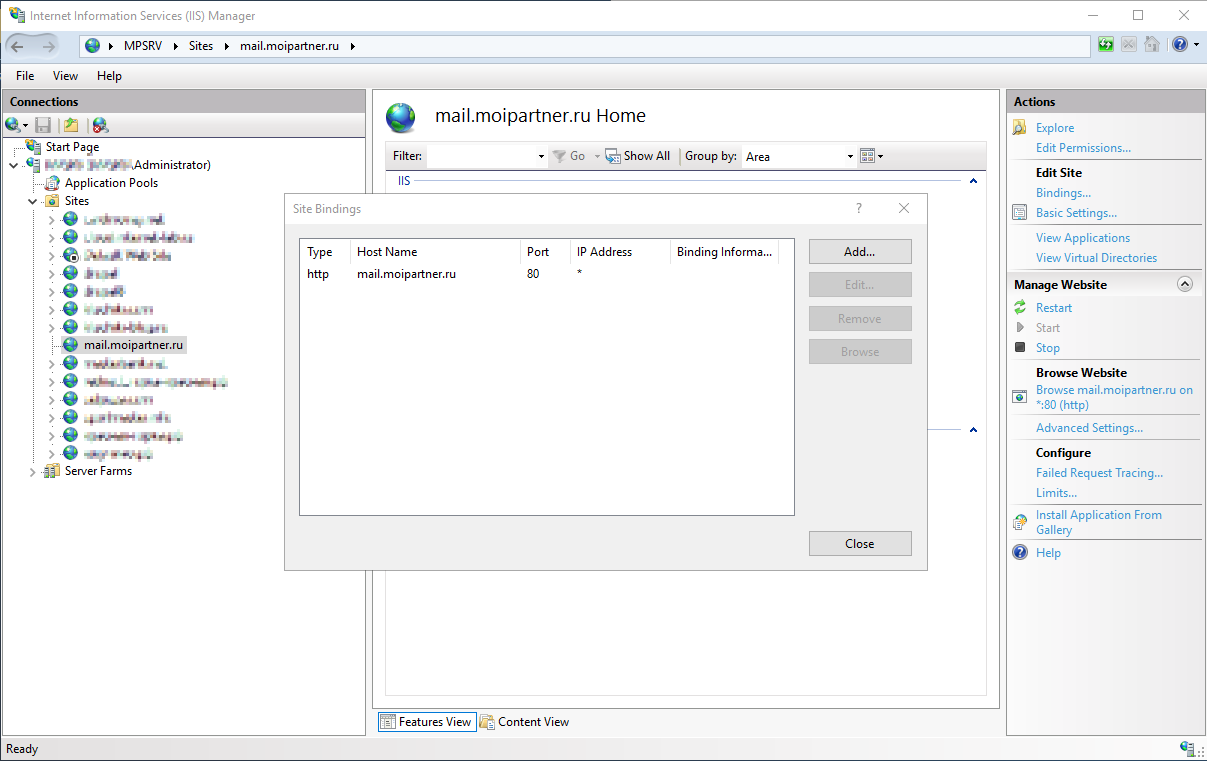
Проверяем, что сайт работает.
Папка
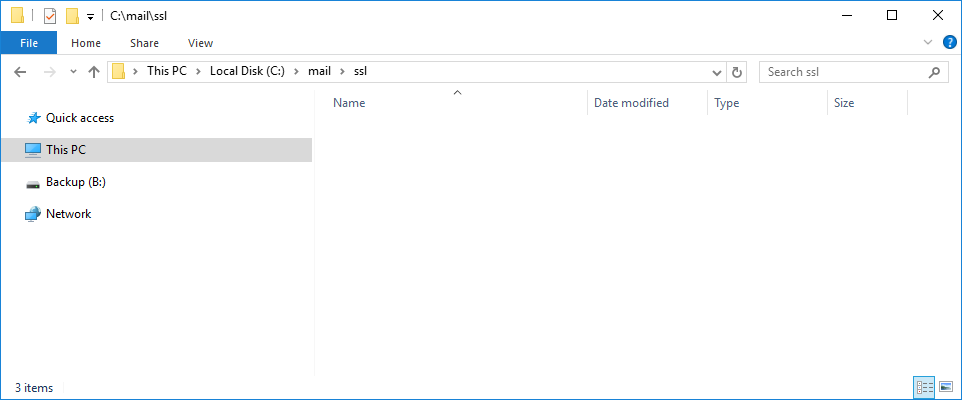
Создаём папку для хранения сертификатов. Я создаю C:\mail\ssl.
Скрипт для перезапуска hMailServer
Сертификат Let’s Encrypt действует 90 дней. В планировщике добавится ежедневное правило для обновления сертификатов. Когда сертификат для hMailServer обновится через 90 дней, то hMailServer нужно перезагрузить, напишем для этого простой скрипт. Создадим в папке C:\mail\ssl файл restart_hmailserver.bat с содержимым.
@ECHO OFF
NET STOP hmailserver
NET START hmailserver
Выпуск сертификатов
Читаем статью IIS — SSL сертификат Let’s Encrypt и генерируем для нашего сайты SSL сертификаты Let’s Encrypt.
Запускаем wacs.exe под администратором.

Нам нужен пункт «Create new certificate» with advanced option». Пишем «m».
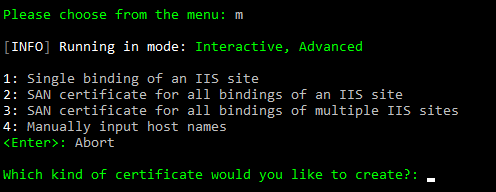
Выбираем «SAN certificate for all bindings of an IIS site». Пишем «2».
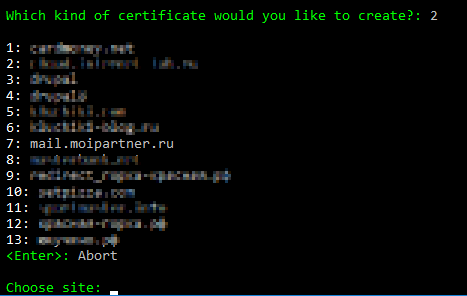
Находим в списке домен своего почтового сервера, пишем его номер, у меня «7».

Выбираем список доменных имён для исключения. Или ввод, если исключений нет. Я нажимаю Enter.

Я нажимаю Enter.
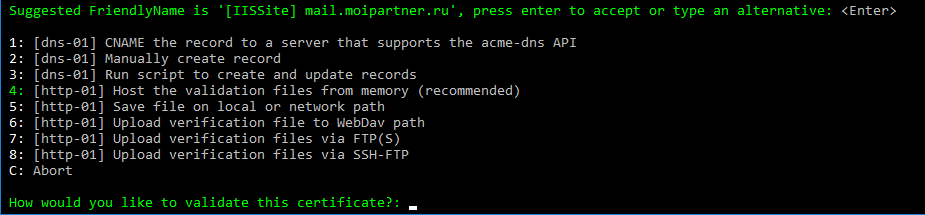
Выбираем способ подтверждения владения доменом. Для IIS это «4».
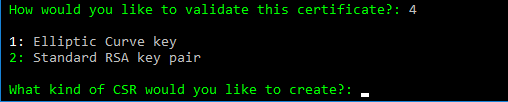
Тип CSR. Пишем «2».

Вот теперь важный пункт, где храним сертификаты. Выбираем «3», чтобы записать их в папку.
Нас спросят, в какую папку записывать сертификаты, указываем C:\mail\ssl.
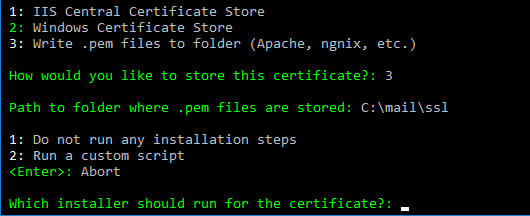
Теперь спрашивают, нужно ли выполнить скрипт после записи сертификатов. Пишем «2», конечно нужно перезапустить hMailServer!

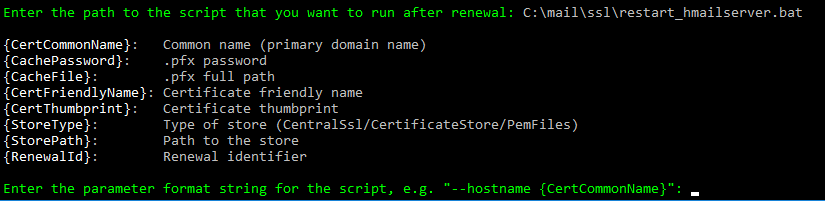
Просят указать путь к скрипту. Пишем C:\mail\ssl\restart_hmailserver.bat.

Здесь у меня уже был ранее создана задача перевыпуска этого сертификата, пишу «y».
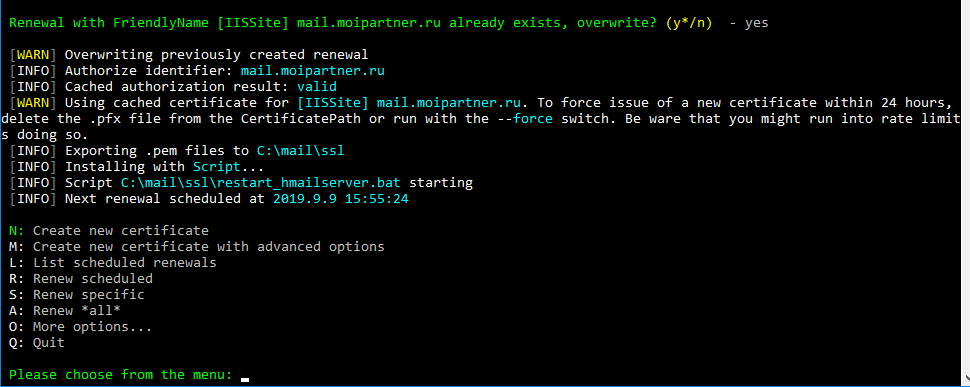
И так, создаётся задача на обновление сертификата.
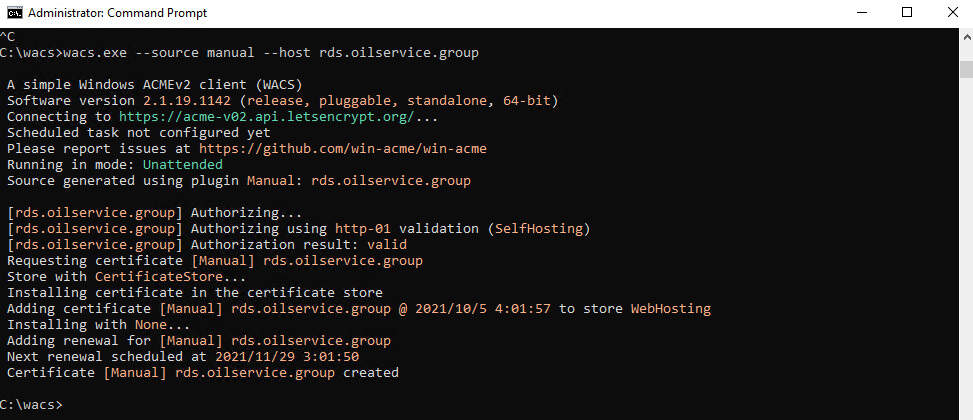
Происходит процедура проверки владения доменом — успех.
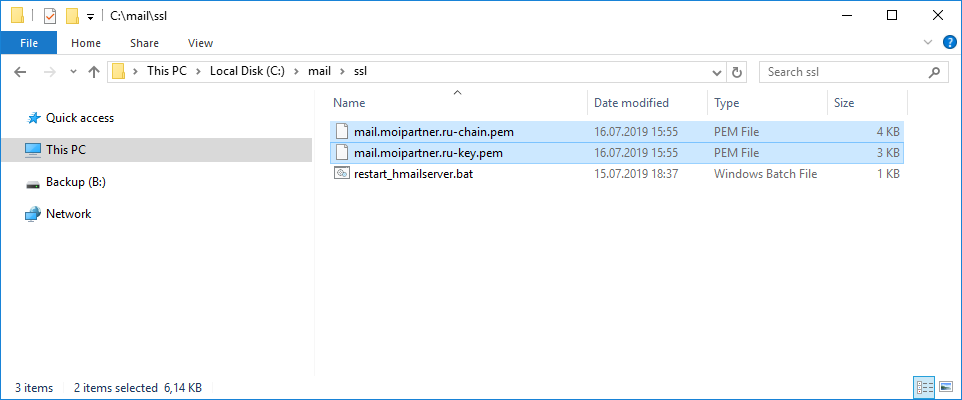
Экспортируются файлы сертификата в C:\mail\ssl.
Выполняется скрипт C:\mail\ssl\restart_hmailserver.bat, это нам пока не нужно, понадобится при выпуске следующих сертификатов.
Проверяем, что файлы созданы:
Настройка SSL в hMailServer
В админке hMailServer в Settings > Advanced > SSL certificates добавляем сертификат.
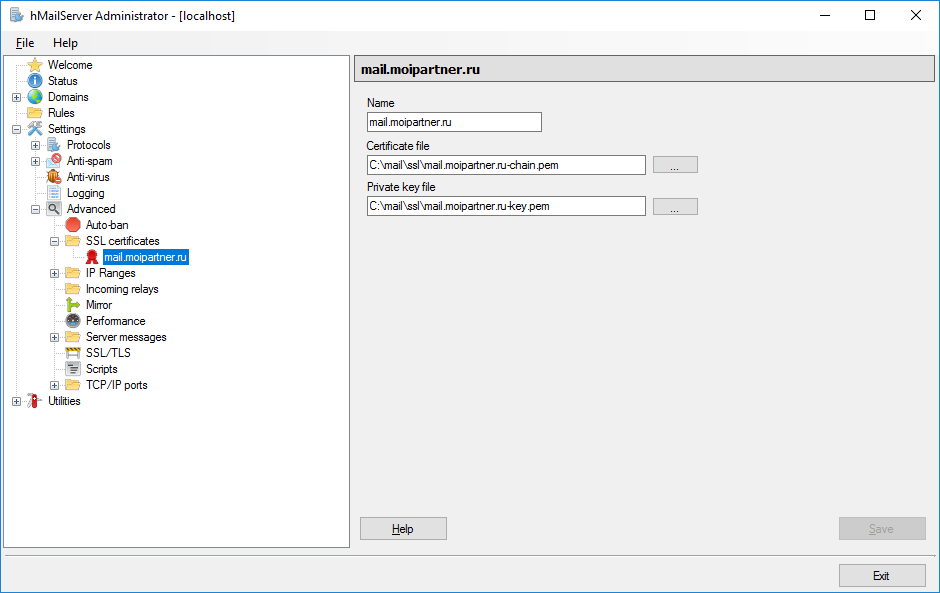
Certificate file — указываем путь к *-chain.PEM файлу.
Private key file — указываем путь к *.key.PEM файлу.
В админке hMailServer в Settings > Advanced > TCP/IP ports добавляем 587 SMTP порт.
- Протокол: SMTP
- TCP/IP adress: 0.0.0.0
- TCP/IP port: 587
- Connection security: SSL/TLS
- SSL Certificate: из выпадающего списка выбираем добавленный ранее сертификат.

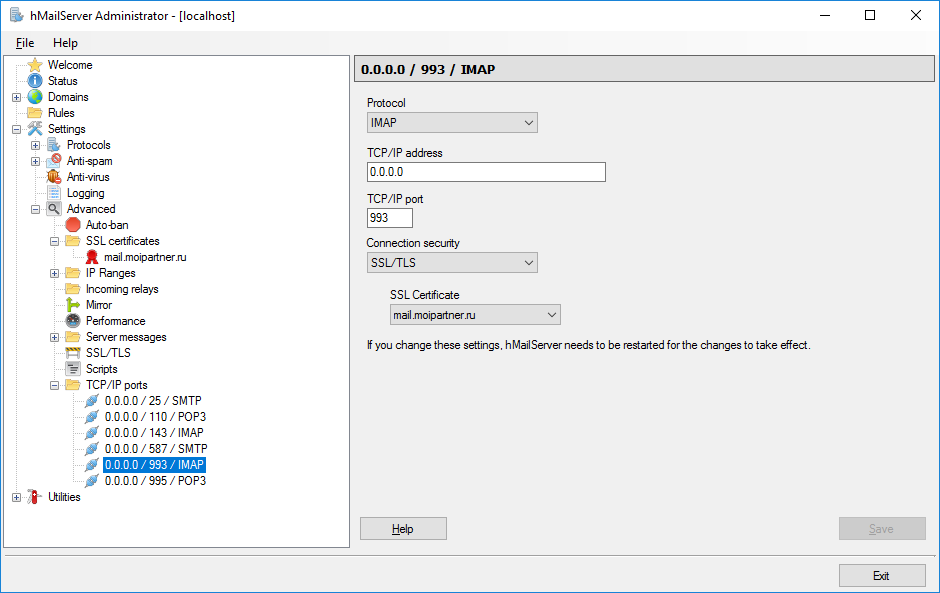
В админке hMailServer в Settings > Advanced > TCP/IP ports добавляем 993 IMAP порт.
- Протокол: IMAP
- TCP/IP adress: 0.0.0.0
- TCP/IP port: 993
- Connection security: SSL/TLS
- SSL Certificate: из выпадающего списка выбираем добавленный ранее сертификат.
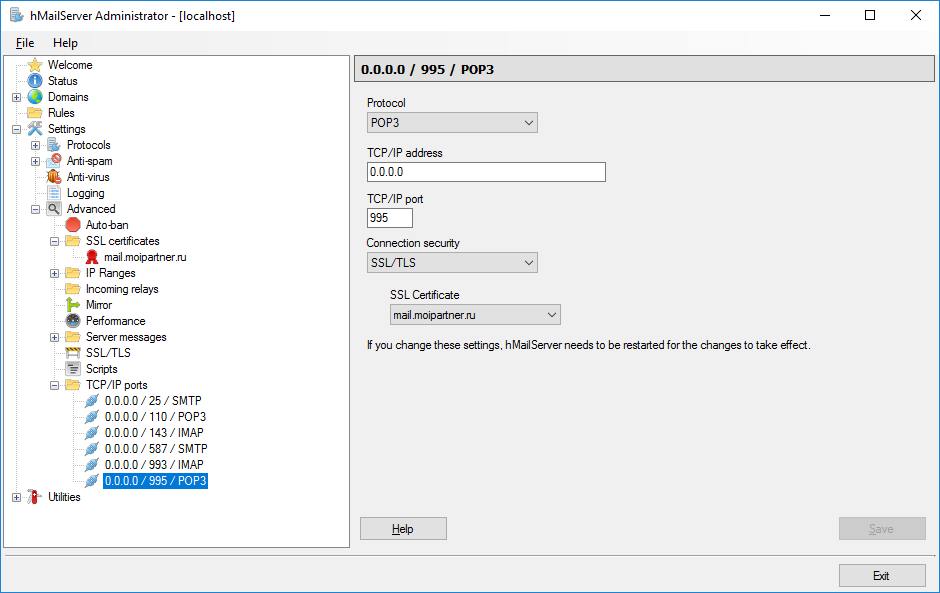
В админке hMailServer в Settings > Advanced > TCP/IP ports добавляем 995 POP3 порт.
- Протокол: POP3
- TCP/IP adress: 0.0.0.0
- TCP/IP port: 995
- Connection security: SSL/TLS
- SSL Certificate: из выпадающего списка выбираем добавленный ранее сертификат.
На этом настройка SSL для hMailServer завершена.
Проверка
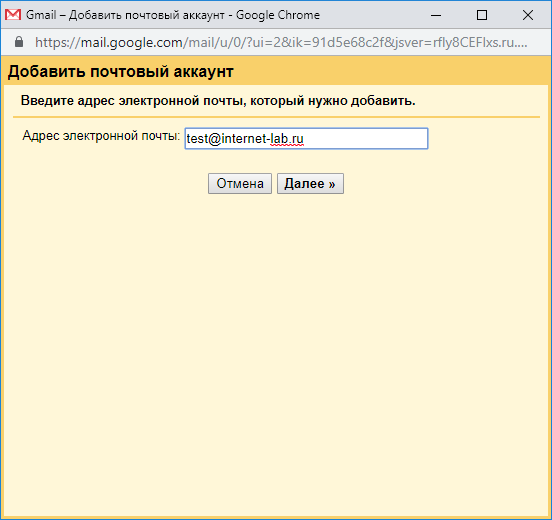
Проверяем на gmail
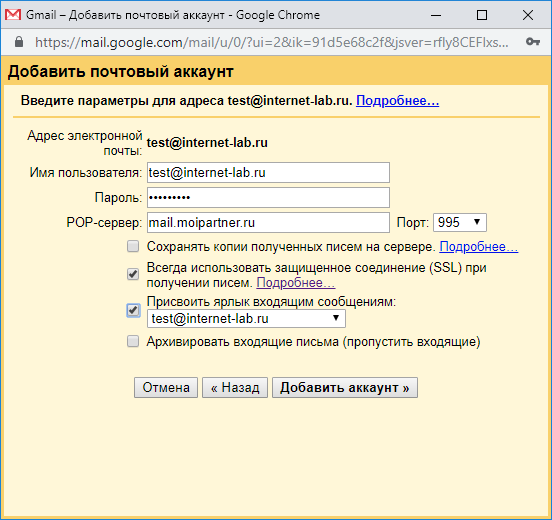
Проверяем на gmail как работает SSL на 995 порту POP3.
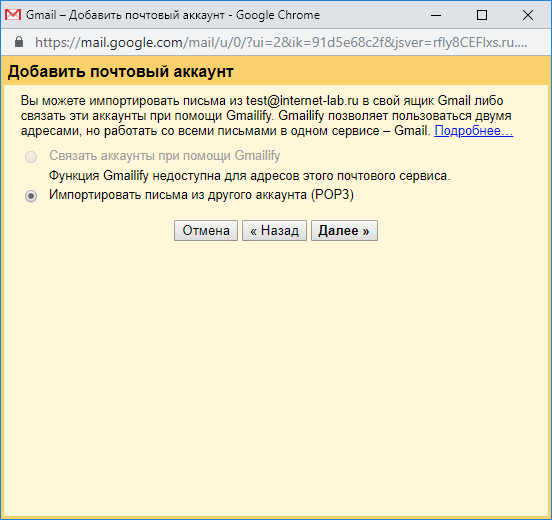
Импортировать письма из другого аккаунта (POP3). Далее.
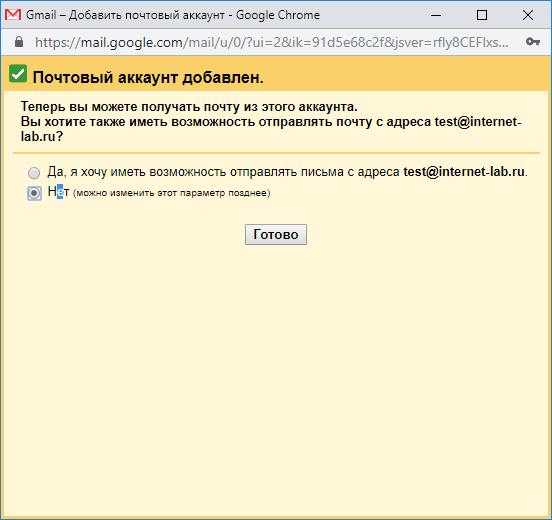
Почтовый аккаунт добавлен. Готово.
Напишем на тестовый ящик письмо и проверим почту.
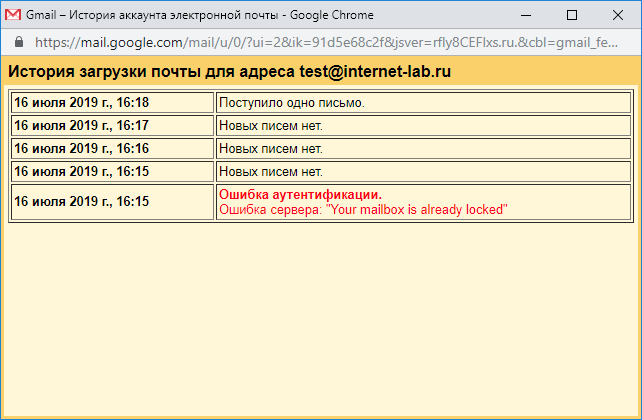
Поступило одно письмо. 995 POP3 через SSL работает.
Проверяем в Outlook
Проверяем в Outlook как работает SSL на 995 порту IMAP и на 578 порту SMTP. Создаём новую учётную запись в Outlook.
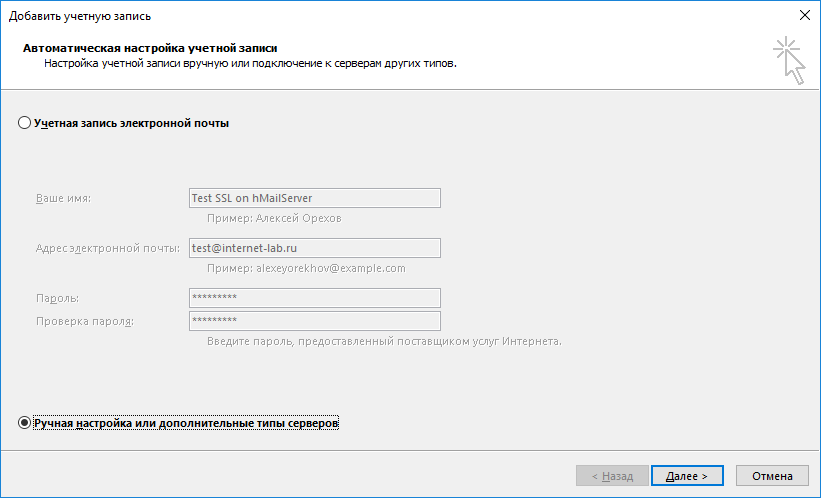
Выбираем «Ручная настройка или дополнительные типы серверов». Далее.
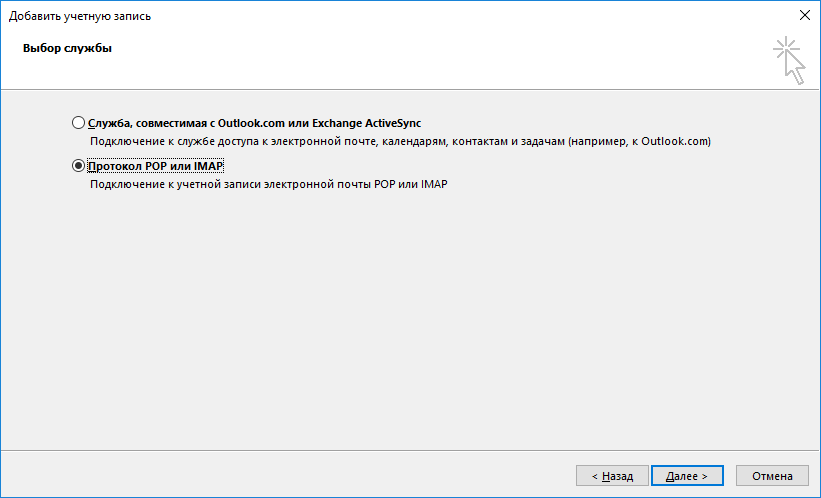
Выбираем «Протокол POP или IMAP». Далее.

Вкладка «Сервер исходящей почты»:
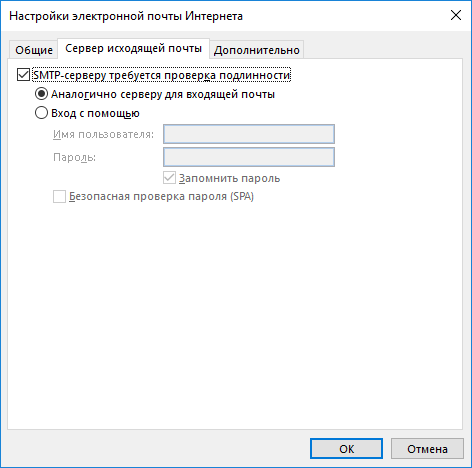
Указываем, что серверу исходящей почты тоже требуется авторизация.
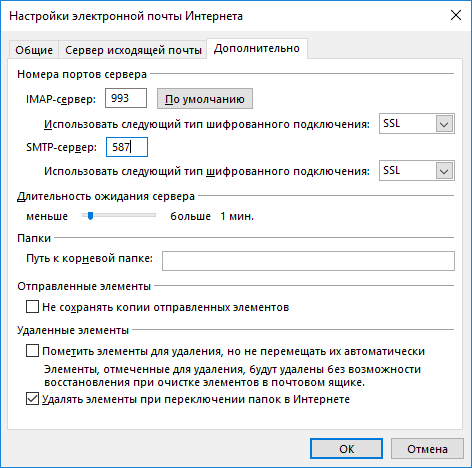
IMAP-сервер, пишем порт 993, тип шифрования SSL.
SMTP-сервер, пишем порт 587, тип шифрования SSL.
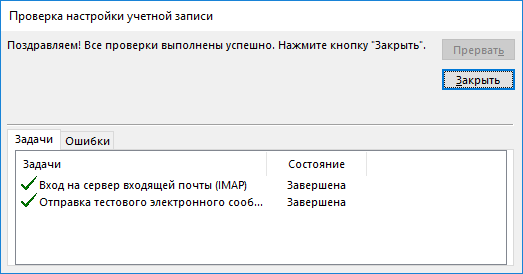
Проверки прошли успешно.
Заключение
Мы с вами успешно настроили и протестировали настройку SSL сертификатов от Let’s Encrypt для почтового сервера hMailServer с помощью IIS. Более того, сертификаты будут автоматически обновляться и перезапускать hMailServer после обновления.
Если вы используете платные SSL сертификаты, то настройка SSL происходит таким же образом, просто пропускаете все шаги для Let’s Encrypt, сохраняете свои сертификаты в любую папку у настраиваете их в админке hMailServer.
Using Let’s Encrypt Certificates with RDS Gateway & Web Access
Then, run wacs.exe on the RD Gateway server, as described above. Select the desired IIS site (usually it is the Default Web Site. Let’s Encrypt will issue you a new certificate and bind it to the IIS website, and the automatic certificate renewal task will appear in the Task Scheduler.
You can manually export this certificate and bind it to the required RDS services through the SSL binding. But you will have to perform these steps manually every 60 days when the Let’s Encrypt certificate is renewed.
We can use the PowerShell script to automatically bind SSL certificate to the RDS Gateway after updating the Let’s Encrypt certificate.
To automatically get the certificate thumbprint from the specified IIS site, use the modified script ImportRDGateway_Cert_From_IIS.ps1 (based on the ImportRDGateway.ps1).
You can run this script manually:
powershell -File ImportRDGateway_Cert_From_IIS.ps1
If your RDS Gateway runs on the IIS “Default Web Site” with index 0, you can use the script without changes.
To get the site ID on IIS, open the PowerShell console and run:
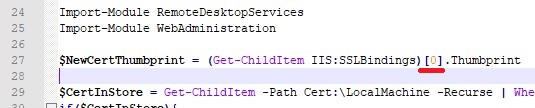
 The ID column shows the index of your site, subtract one from it. The resulting index should be specified instead of 0 in line 27 of the PowerShell script:
$NewCertThumbprint = (Get-ChildItem IIS:SSLBindings)[0].Thumbprint
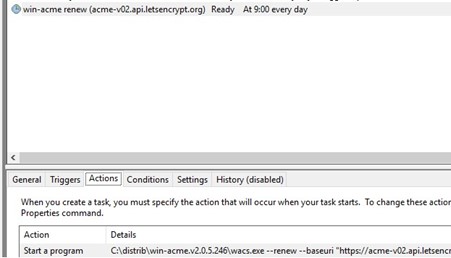
Now open the win-acme-renew scheduler task, and on the Actions tab add a new task that runs the ImportRDGateway_Cert_From_IIS.ps1 script after updating the SSL certificate.
In order not to change the PowerShell execution policy, you can run the script with the command:
PowerShell.exe -ExecutionPolicy Bypass -File c:\inetpub\letsencrypt\ImportRDGateway_Cert_From_IIS.ps1
Now the script for binding the SSL certificate to the RDS will be executed immediately after the Let’s Encrypt certificate is renewed. In this case, the RD Gateway service is automatically restarted with the command:
Изменение адреса в Connection Bar.
Вам нравится имя вверху RDCB01.OILSERVICE.LOCAL? Мне нет. Не зря же я делал RDS.OilService.Group
Другое дело, когда группа высокой доступности и ты там обязан вписать имя соединения, выбрав какое-нибудь красивое, а если один Брокер ?
Исправить это дело можно с помощью PowerShell. Давайте выполним командлет:
Set-RDSessionCollectionConfiguration -CollectionName "RDS" -CustomRdpProperty "full address:s:rds.oilservice.group" -ConnectionBroker RDCB01.oilservice.localКомандлет выполнился успешно.

Теперь снова скачаем ярлык с RdWeb и попробуем зайти, посмотреть что изменилось:
Строка состояния поменяла название. Чего и хотелось.
В следующей статье мы займемся виртуальными профилями на базе FSLogix.